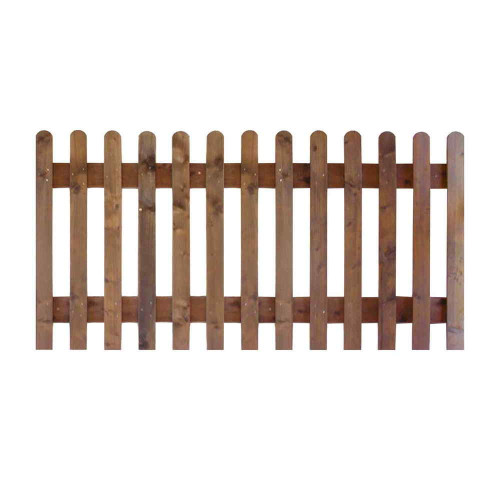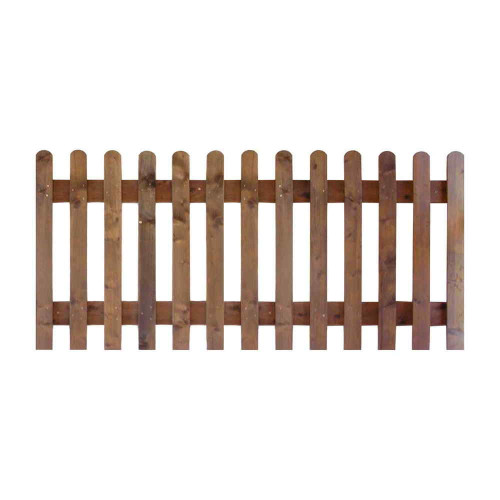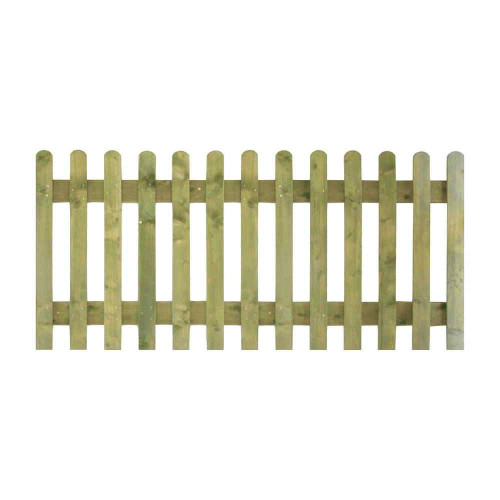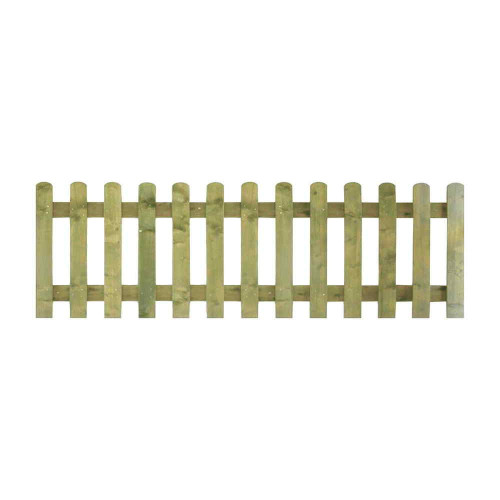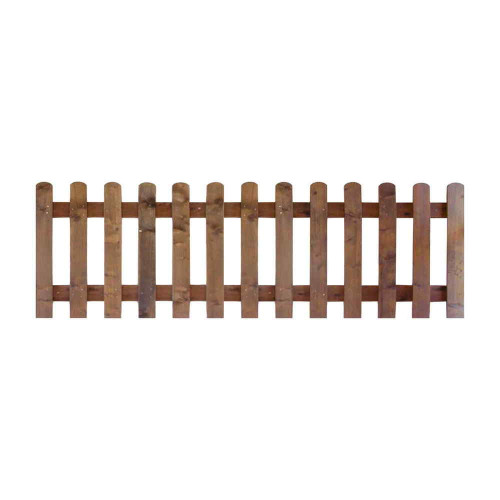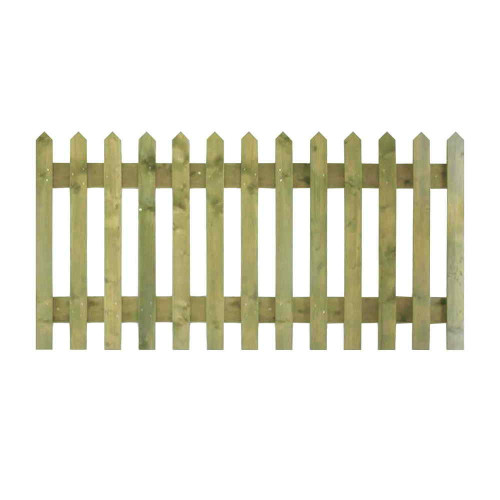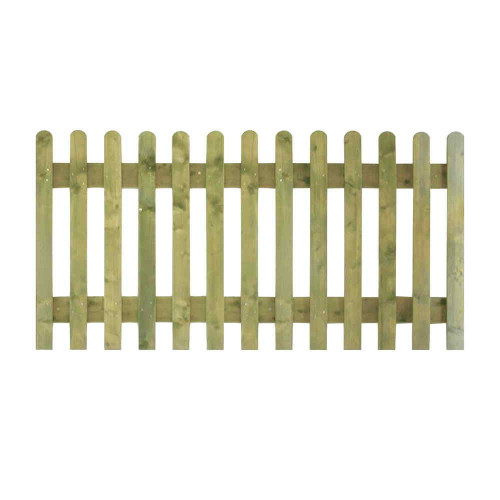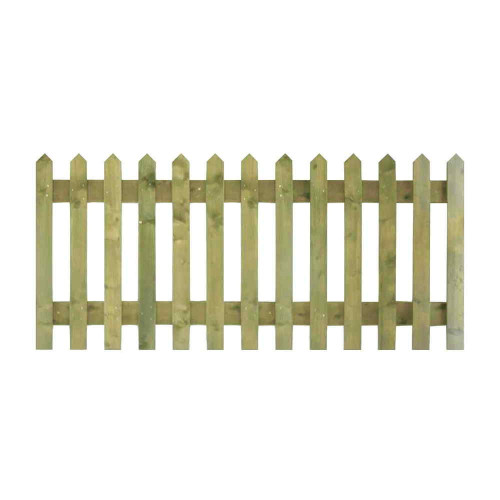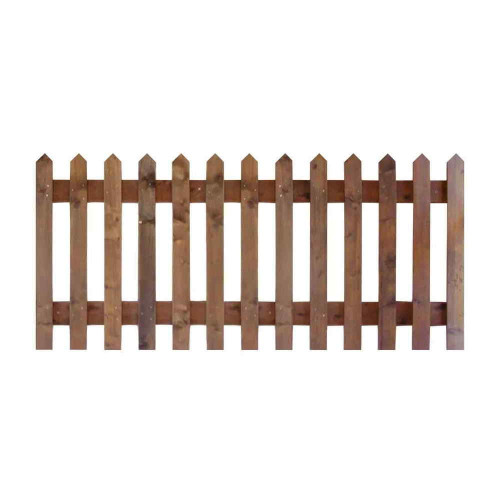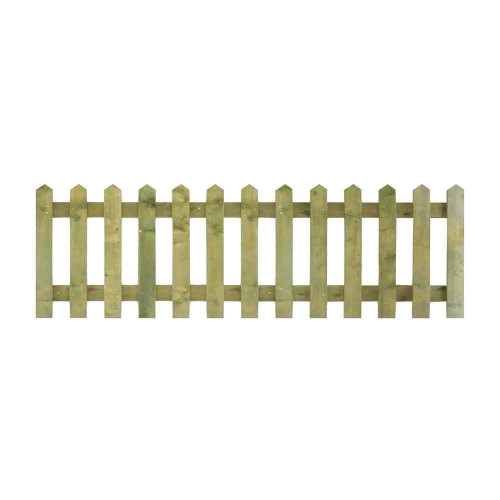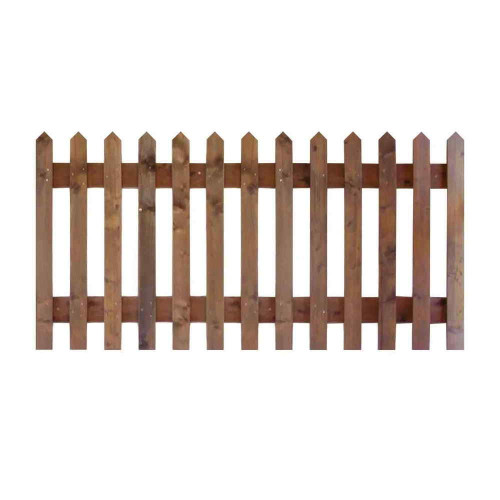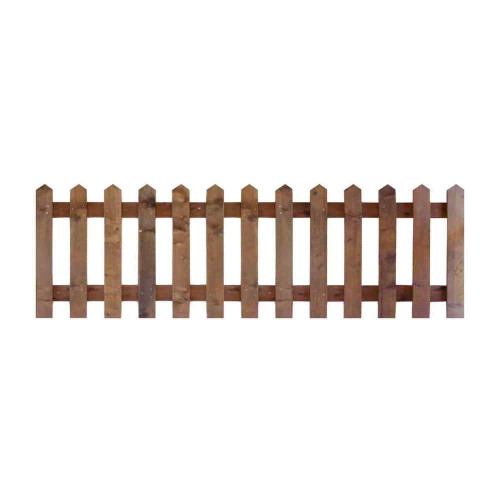




Quick answer: Install Picket Fence Panels between secure, accurately spaced posts, keeping each panel level and slightly clear of persistent ground moisture. East Coast Fencing's current panels are nominally 1.83m wide and available in 0.6m, 0.9m and 1.2m heights, with Round Top and Point Top styles. Measure every bay before fixing, support the panel by its horizontal rails, use exterior-grade fixings, and plan matching gates and slopes before setting the posts.
Picket fencing looks simple, but a neat finished run depends heavily on setting out.
The open design makes small installation errors easy to see. A leaning post, a panel sitting slightly higher than its neighbour or an uneven gap beneath the fence can interrupt the repeated line of the pales across the entire boundary.
The good news is that Picket Fence Panels are relatively straightforward to handle compared with tall solid privacy panels, particularly at lower heights.
The key is to establish the posts, panel levels and gate opening accurately before fixing everything permanently.
What Size Are Picket Fence Panels?
East Coast Fencing's current Picket Fence Panels are nominally 6ft wide, approximately 1.83m.
The current range includes three nominal heights:
- 2ft, approximately 0.6m
- 3ft, approximately 0.9m
- 4ft, approximately 1.2m
Round Top and Point Top styles are available, with pressure-treated brown and green/natural finishes across the range.
Do not set posts from the nominal 6ft measurement alone. Check the actual panel dimensions before installation, particularly where you are replacing panels within an existing fence.
How Are Picket Fence Panels Constructed?
Picket panels use evenly spaced vertical timber pales fixed to horizontal supporting rails.
The pales create the distinctive open appearance, while the rails hold them together and provide the structural areas used to support and fix the panel.
This distinction matters during installation.
The panel should be handled and fixed through its structural framing rather than treating an individual pale as though it supports the complete panel.
What Do You Need to Install Picket Fence Panels?
A typical installation may require:
- Picket Fence Panels
- Suitable wooden fence posts
- Exterior-grade screws, brackets or fence clips
- Post-setting material where posts are installed into the ground
- Tape measure
- String line
- Spirit level
- Post-hole digging equipment
- Drill and driver
- Temporary blocks or supports
- Suitable personal protective equipment
If the fence includes a gate, plan the Picket Gate, Gate Posts and Garden Gate Furniture at the same time rather than leaving the entrance until the end.
Should You Use Wooden Posts With Picket Fence Panels?
Wooden posts are the most natural pairing for Picket Fence Panels.
They provide straightforward fixing points for:
- Exterior screws
- Fence clips
- Brackets
They also maintain the all-timber appearance normally associated with picket fencing.
Because picket panels are generally lower and more open than full-height privacy fencing, their support requirements can be different from a 6ft solid panel. The posts still need to suit the fence height, site exposure and ground conditions.
Can Picket Fence Panels Be Used With Concrete Posts?
Possible installations depend on the particular post system and panel dimensions, but timber posts are generally more straightforward for conventional picket fencing.
Picket panels are designed around horizontal rails that are easy to secure to timber.
If you are considering an existing concrete-post system, check compatibility carefully rather than assuming a nominal 6ft panel will simply slot into place.
How Do You Measure for Picket Fence Panels?
For a new fence, start by measuring the complete boundary.
Then determine:
- Where the first post will sit
- How many full panel bays are required
- Whether a gate is included
- Whether the final bay will need a custom solution
- How ground levels change along the run
For an existing fence, measure every bay individually.
Why Should You Measure Existing Bays at the Top and Bottom?
Older timber posts can lean or twist.
A gap that measures correctly near the ground may be narrower at the top.
Measure:
- Near the lower rail position
- Near the upper rail position
If the measurements differ significantly, inspect the posts before ordering replacement panels.
Do not force a rigid panel into a bay that has become too narrow.
Should Posts Be Set Exactly 1.83m Apart?
Not automatically.
The correct post spacing depends on:
- The actual panel width
- Post dimensions
- Whether the panel sits between or across the post faces
- The chosen fixing method
Measure the real components before digging all of the holes.
A small spacing error repeated across a long run can create a much larger problem at the final post.
How Do You Set Out a Straight Picket Fence?
Use a string line.
Mark the start and end of the proposed fence and tension a line between them.
This gives you a reference for positioning the posts consistently.
For every post, check:
- Position along the boundary
- Distance from the previous post
- Vertical alignment
- Finished post height
A post can be perfectly vertical while still sitting out of line with the rest of the fence.
Should You Install All the Posts Before the Panels?
You can if the whole run has been accurately measured.
For DIY installation, progressing one or two bays at a time can reduce the risk of cumulative spacing errors.
A useful sequence is:
- Install the first post.
- Confirm the actual panel allowance.
- Position the next post.
- Check the spacing and line.
- Continue along the boundary.
The important point is to measure consistently rather than simply estimating each gap.
How Deep Should Picket Fence Posts Be?
There is no single post depth that suits every picket fence.
Post installation depends on:
- Fence height
- Post dimensions
- Soil conditions
- Wind exposure
- Whether the post also supports a gate
A low 2ft decorative fence places different demands on its posts from a 4ft boundary in an exposed location.
Gate Posts may also need to be more substantial than ordinary intermediate posts because a gate creates repeated moving loads.
How Do You Keep Picket Fence Posts Vertical?
Check each post in both directions with a spirit level.
Temporary braces can hold it while the foundation material is being placed and initially cures.
Do not check only the face visible from the garden.
A post can appear upright from one direction while leaning sideways along the fence line.
How High Should Picket Fence Panels Sit Above the Ground?
Keep the lower timber clear of persistent contact with wet soil and trapped vegetation where practical.
The exact clearance depends on:
- Ground level
- Grass
- Paths
- Pets
- Changes in level
The aim is not to create an unnecessarily large gap, but to avoid leaving the panel permanently sitting in damp material.
Do Picket Fence Panels Need Gravel Boards?
Not every picket fence needs one.
A gravel board creates a solid strip below what is otherwise an open fence, so it changes the appearance considerably.
It may still be useful where:
- Soil sits high against the boundary
- A firm lower edge is required
- Ground levels are uneven
- The lower panel needs greater separation from damp material
For a traditional open front-garden picket fence, keeping the panel slightly clear of the ground may look more natural than installing a substantial gravel board beneath it.
How Do You Position the First Picket Fence Panel?
Take extra time with the first panel because it establishes the visual line for everything that follows.
Support it temporarily at the required finished height.
Then check:
- The panel is level
- The pales are vertical
- The gap beneath the panel is consistent
- The top line is at the intended height
- The panel sits correctly relative to both posts
Only secure it once those checks are complete.
Where Should You Fix Picket Fence Panels?
Use the horizontal supporting rails and structural parts of the panel.
Avoid relying on an individual Picket Pale as the principal fixing point.
The rails distribute the panel load and are better suited to connecting the panel to the posts.
What Fixings Should You Use?
Use suitable exterior fixings compatible with pressure-treated timber and the expected load.
Depending on the installation, that may include:
- Exterior screws
- Fence clips
- Appropriate brackets
Avoid ordinary interior screws that are not intended for prolonged outdoor exposure.
Should You Pre-Drill the Panel Rails?
Pre-drilling can be useful where substantial screws are being driven close to the end of a rail.
It can help reduce:
- Splitting
- Fixing movement
- Poor screw positioning
Select the pilot size according to the fixing being used.
How Tight Should the Fixings Be?
The panel should be secure without crushing or distorting the timber.
Do not repeatedly drive screws deeper simply because the driver still turns.
Over-driving can damage the rail around the fixing point.
How Do You Keep Several Picket Panels at the Same Height?
Use a consistent reference.
A string line along the upper edge can help establish a clean top line on level ground.
You can also use:
- A level reference from the posts
- Consistent temporary spacer blocks beneath panels
- A laser level where available
Do not measure every panel independently from uneven soil if you want the tops to remain level.
Why Does Picket Fencing Show Installation Errors So Easily?
The repeated vertical pales create a strong visual pattern.
If one panel:
- Leans
- Sits too high
- Sits too low
- Has a different ground gap
the change becomes easy to spot.
Round and pointed tops make the repeated pattern even more noticeable.
Should Round Top and Point Top Panels Be Installed Differently?
The structural installation is broadly the same.
Both styles need:
- Secure posts
- Level rails
- Consistent height
- Exterior fixings
The main difference is visual.
Whichever top style you choose, keep it consistent along the run unless a deliberate change is part of the garden design.
Can You Mix Picket Fence Panel Heights?
You can, but changes should be planned rather than accidental.
Different heights may be useful where:
- A low decorative fence transitions to a more substantial boundary
- A garden entrance needs emphasis
- Ground levels change
A random jump between panel heights usually looks unfinished.
How Do You Install Picket Fence Panels on a Slope?
Rigid panels are normally stepped from one bay to the next.
Each panel remains level, but its starting height changes as the ground rises or falls.
This keeps the panel:
- Square
- Structurally unchanged
- Visually consistent within each bay
Should Picket Panels Follow the Slope?
Standard framed panels should not normally be twisted out of shape to follow a gradient.
Where a continuous sloping top line is important, constructing the fence from individual Picket Pales and rails can provide greater flexibility.
This allows the pale positions to respond individually to the changing ground.
How Do You Plan Stepped Picket Fencing?
Measure the total change in ground level before installing the posts.
Then decide how much each bay needs to step.
Consider:
- Top-line appearance
- Bottom clearance
- Gate position
- Whether pets need to remain enclosed
Large gaps can appear beneath the downhill side of stepped panels, so plan those before installation.
Can You Fill Gaps Under Picket Panels With Soil?
Avoid piling damp soil directly against the panel simply to hide an uneven gap.
That can keep the lower pales and rails wet.
If a significant level difference needs to be managed, consider an appropriate landscaping or lower-boundary detail instead.
Can Picket Fence Panels Be Cut to Width?
Modifying a complete panel is more involved than cutting one loose Picket Pale.
A panel contains rails and repeated pale spacing.
If you shorten it substantially, you may need to:
- Cut the horizontal rails
- Remove one or more pales
- Re-establish suitable end spacing
- Rebuild or secure the panel edge
Where possible, plan post positions to use complete panels.
What If the Final Fence Bay Is Too Narrow?
A custom section can often be built from separate rails and Picket Pales more neatly than heavily modifying a finished panel.
This can preserve:
- Consistent pale spacing
- Matching top style
- A clean finished edge
Plan the final bay before setting every post so you do not end up with an unexpectedly narrow gap.
Can You Cut Picket Fence Panels Shorter?
Reducing the height of a finished panel normally means cutting the individual decorative pale tops, which changes the intended appearance.
If you require a lower fence, choosing the appropriate 2ft, 3ft or 4ft panel from the start is usually preferable.
What Should You Do With Freshly Cut Treated Timber?
If pressure-treated timber has to be cut, freshly exposed surfaces should receive suitable end-grain preservative treatment where required by the relevant treatment guidance.
Minimise unnecessary cutting where a standard product already suits the installation.
How Do You Install a Matching Picket Gate?
Plan the gate opening before setting the surrounding fence posts.
The gate requires:
- A suitable hinge post
- A suitable closing post
- Correct operating clearance
- Appropriate hinges
- A suitable latch
Gate Posts may need to be more substantial than the posts carrying stationary fence panels because the gate places repeated moving loads on them.
Should the Picket Gate Match the Panels?
A matching pale top, height and treatment colour usually creates the most consistent appearance.
For example:
- Round Top panels with a Round Top Picket Gate
- Point Top panels with a Point Top Picket Gate
Gate operation still takes priority over perfect visual alignment.
Allow enough clearance for the gate to swing without catching the ground or neighbouring panel.
How Wide Should the Gate Opening Be?
Measure the actual gate and allow for:
- Hinges
- Latch operation
- Normal movement
- Required side clearances
Do not simply leave a gap equal to the nominal gate width and assume all the ironmongery will fit within it.
Can Picket Panels Be Fixed Beside a Wall?
Yes, where the end of the fence has a suitably secure support.
Depending on the construction, a properly fixed timber support may be used against suitable masonry.
Do not rely on weak render or loose masonry to support the end of the panel.
Can Picket Fence Panels Be Used Around Driveways?
Yes.
The open design is useful where retaining visibility is important.
Keep the fence and posts positioned so they do not create unnecessary obstructions around:
- Vehicle entrances
- Pedestrian routes
- Turning areas
A matching Picket Gate can provide a coordinated pedestrian entrance.
Can Picket Fence Panels Be Installed Around Paths?
Yes.
Low picket panels are particularly useful for defining paths without enclosing them.
When setting the posts, allow enough path width so the fence does not make access unnecessarily narrow.
Also consider whether the gate will open across the walking route.
Can Picket Fence Panels Be Used Around Vegetable Gardens?
Yes.
The open construction can divide a growing area without blocking as much light as solid fencing.
It can also provide a clear visual boundary between:
- Growing beds
- Lawns
- Paths
- General garden areas
Do not assume an ordinary picket fence will exclude every animal. Pale spacing, panel height and the gap underneath all affect containment.
Can Picket Fence Panels Be Used Around Play Areas?
They can create a visible garden division while retaining good visibility through the fence.
Check:
- Panel condition
- Pale spacing
- Gate fittings
- Fixings
- Any protruding or damaged timber
Ordinary domestic garden fencing should not be treated as a substitute for specialist safety barriers where one is required.
Are Picket Fence Panels Good in Windy Gardens?
The gaps between the pales allow substantially more airflow than solid Closeboard or Waney Lap fencing.
This means the panel presents less continuous surface area to the wind.
It still needs secure posts and suitable fixings, particularly with taller 4ft panels or exposed boundaries.
Do Lower Picket Panels Need Less Support?
A low open panel generally places less demand on its posts than a tall solid privacy panel.
That does not mean installation can be careless.
Loose posts can still cause:
- Leaning panels
- Misaligned top lines
- Gate problems
- Rattling
How Do You Replace One Picket Fence Panel?
First inspect the existing posts.
If they remain secure:
- Remove the old panel fixings.
- Remove the damaged panel carefully.
- Measure the bay again.
- Check the required top profile and height.
- Position the replacement panel.
- Align it with neighbouring panels.
- Secure it using suitable exterior fixings.
Will a New Picket Panel Match an Older Fence?
A new pressure-treated panel may initially appear different from older weathered timber.
Differences can include:
- Colour
- Surface appearance
- Natural grain
The new panel will also change as it weathers outdoors.
Check the top style, pale spacing and rail positions carefully because differences in construction can be more noticeable than colour variation.
Should You Replace the Posts at the Same Time?
Only where necessary.
Existing posts can remain if they are:
- Secure
- Suitably aligned
- Structurally sound
- Compatible with the new panel
If a wooden post moves at ground level or has significant decay, address that before installing a new panel.
Do Picket Fence Panels Need Painting After Installation?
The current East Coast Fencing panels are pressure treated for outdoor use, so they do not need an immediate decorative coating simply because they have been installed.
If you later want to change or refresh the appearance, use a compatible exterior timber coating once the timber is sufficiently dry and properly prepared.
Will Brown and Green/Natural Panels Change Colour?
Yes.
Pressure-treated timber naturally changes appearance as it is exposed to sunlight and weather.
Brown treatment provides a warmer starting colour, while green/natural treatment gives the familiar appearance of newly pressure-treated timber.
Neither should be expected to retain its original colour indefinitely.
How Should You Maintain Picket Fence Panels?
Routine maintenance is straightforward.
Periodically check:
- Posts
- Panel fixings
- Horizontal rails
- Individual pales
- The gap beneath the fence
Keep grass, soil and dense vegetation away from the lower timber where practical.
What Causes Picket Fence Panels to Lean?
The most common cause is usually the supporting structure rather than every pale suddenly moving.
Check for:
- Leaning posts
- Loose post foundations
- Failed brackets
- Damaged panel rails
Moving the panel within a failing post system will not solve the underlying problem.
Why Is the Top Line Uneven?
Possible causes include:
- Posts installed at different heights
- Panels fixed at different levels
- Changing ground levels
- Panels of different nominal heights
Use the structural panel rails and a consistent reference to diagnose the issue rather than judging only from the decorative pale tips.
Common Picket Fence Panel Installation Mistakes
- Setting every post from an assumed 6ft panel width
- Failing to measure existing bays at both top and bottom
- Installing posts out of line
- Fixing the first panel without carefully levelling it
- Allowing panel heights to drift along the fence run
- Leaving the lower timber in persistent contact with wet soil
- Using unsuitable indoor fixings
- Relying on individual pales as structural fixing points
- Over-driving screws into the rails
- Trying to twist rigid panels down a slope
- Cutting finished panels extensively instead of planning a custom end bay
- Setting the fence before planning the gate opening
- Using weak intermediate posts as gate posts
- Replacing panels without checking unstable existing posts
Picket Fence Panels Installation Checklist
- Measure the complete fence run.
- Check the actual panel width and height.
- Choose Round Top or Point Top panels.
- Choose 2ft, 3ft or 4ft height.
- Choose the required pressure-treated finish.
- Plan any Picket Gate before setting posts.
- Mark a straight fence line.
- Install suitable wooden posts.
- Measure each existing bay individually where replacing fencing.
- Keep the panel clear of persistent ground moisture.
- Support the first panel at the correct level.
- Fix through structural rails using suitable exterior fixings.
- Check the top line before continuing.
- Step rigid panels on slopes.
- Use individual Picket Pales where a custom sloping or narrow section is more practical.
- Inspect posts and fixings after installation.
FAQs
How Wide Are Picket Fence Panels?
The current East Coast Fencing panels are nominally 6ft wide, approximately 1.83m.
What Heights Are Picket Fence Panels Available In?
The current range includes nominal 2ft, 3ft and 4ft heights, approximately 0.6m, 0.9m and 1.2m.
Are Picket Fence Panels Pressure Treated?
Yes. The current range is pressure treated for outdoor use.
Should Picket Fence Panels Use Wooden Posts?
Wooden posts are the most common pairing because they suit the appearance of picket fencing and provide straightforward fixing points.
Should Picket Fence Panels Touch the Ground?
It is better to keep the lower timber clear of persistent contact with damp soil and trapped vegetation.
Do Picket Fence Panels Need Gravel Boards?
Not automatically. A gravel board can help in some installations, but it also creates a solid lower section beneath what is normally an open fence.
Where Should Picket Fence Panels Be Fixed?
Use the structural horizontal rails rather than relying on individual decorative pales as the main fixing points.
Can Picket Fence Panels Be Installed on a Slope?
Yes. Standard rigid panels are normally stepped from one post bay to the next.
Can Picket Fence Panels Be Cut to Width?
They can be modified, but substantial shortening affects the rails and pale spacing. A custom section built from Picket Pales and rails may be neater for awkward end bays.
Can One Picket Fence Panel Be Replaced?
Yes, provided the existing posts remain secure and the replacement panel dimensions and top profile are compatible.
Can Picket Fence Panels Be Installed With a Matching Gate?
Yes. Plan the gate opening separately and use suitably substantial Gate Posts and appropriate Garden Gate Furniture.
Can Picket Fence Panels Be Installed DIY?
Yes. Their relatively low height makes them manageable for many capable DIY installers, but accurate post spacing, alignment and panel levels are still important.
What Is the Best Way to Install Picket Fence Panels?
Start with accurate setting out.
The current East Coast Fencing range is nominally 1.83m wide, but the actual panel, posts and fixing arrangement should determine your final bay spacing.
Install suitable wooden posts in a straight line and make sure each one is secure before relying on it to support the panels.
Keep the lower timber slightly clear of persistent damp ground where practical, then support the first panel at the required finished height.
Use the structural horizontal rails as the fixing points, check the panel with a spirit level and establish a consistent top line before continuing along the fence.
On slopes, keep complete panels square and step them between posts. If the terrain is too irregular for rigid panels to look neat, building the awkward section from individual Picket Pales and rails can provide greater control.
If a gate is included, plan it before installing the surrounding panels. The gate opening, posts, hinges and latch all require their own allowances.
Picket Fence Panels are forgiving in terms of weight, but not appearance. The repeated pale pattern makes uneven heights and leaning posts easy to spot. Careful measuring at the beginning is therefore the simplest way to produce a clean, consistent finished boundary.