


Quick answer: To install fence posts, confirm the boundary, check for underground services, mark a straight fence line and calculate the exact post spacing from the panels or rails being used. Dig holes suitable for the fence height, post size, ground and wind exposure. Position each post upright, brace it securely and set it with an appropriate post mix or concrete. Allow the foundations to develop sufficient strength before fitting heavy panels or gates.
Fence posts are the structural foundation of a garden fence. The panels may provide privacy and appearance, but the posts transfer panel weight and wind pressure into the ground.
Small errors at the post-installation stage can affect the complete fence. Incorrect spacing can leave panels that do not fit. Shallow foundations can allow the fence to lean, while posts that are not upright make gravel boards, rails and gates difficult to align.
A straightforward timber-panel fence can be a manageable DIY project for someone with suitable tools and practical experience. Concrete posts, heavy gates, difficult excavation, slopes and uncertain buried services make the work more demanding.
This guide explains the full process, from planning the fence line to fitting the final gravel boards and panels.
What Should You Check Before Installing Fence Posts?
Before buying materials or digging holes, confirm:
- The position of the legal boundary
- Who owns or maintains the existing fence
- The permitted completed fence height
- Any covenants or estate restrictions
- The likely position of underground services
- The panel or fencing style
- The required post material and dimensions
- The ground conditions
- The level of wind exposure
- The position and opening direction of any gate
Resolving these points before excavation is easier than changing a fence after the posts have been set.
Fence Post Installation At A Glance
| Stage | Main Task | Key Check |
|---|---|---|
| 1 | Confirm the boundary | Do not rely only on the old fence line |
| 2 | Check restrictions and services | Do not excavate until risks are understood |
| 3 | Choose posts and panels | Match the support system to the fence |
| 4 | Set out the fence line | Use firm stakes and a tight string line |
| 5 | Calculate post spacing | Measure actual products before digging |
| 6 | Excavate post holes | Consider height, soil and exposure |
| 7 | Position and brace posts | Check plumb in two directions |
| 8 | Add foundation material | Follow the product instructions |
| 9 | Recheck alignment | Correct movement before the mix hardens |
| 10 | Fit boards, rails or panels | Do not load foundations prematurely |
Should You Use Timber Or Concrete Fence Posts?
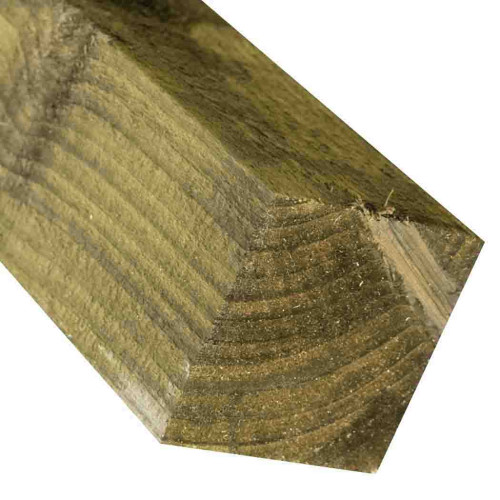
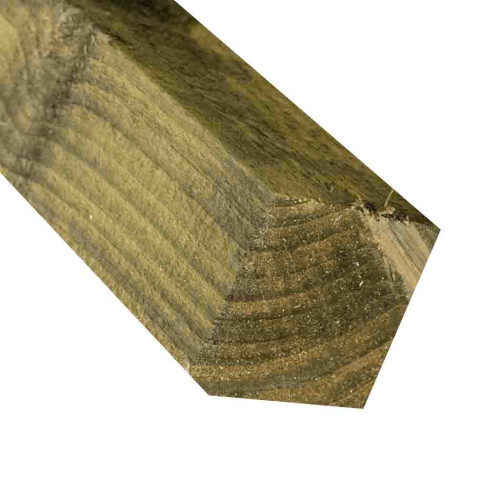
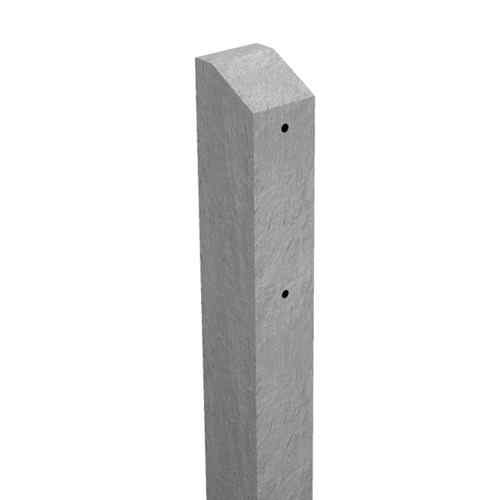
The principal choices for domestic fencing are pressure-treated timber posts and precast concrete posts.
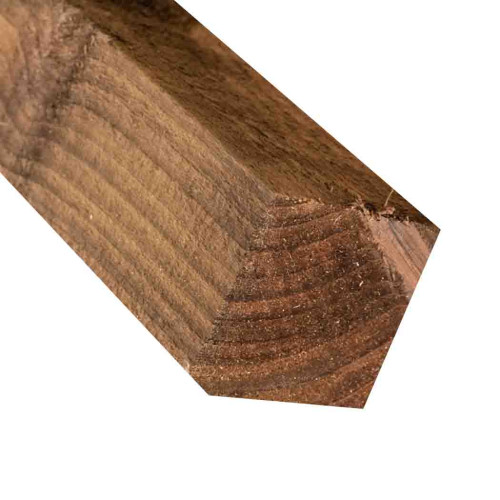
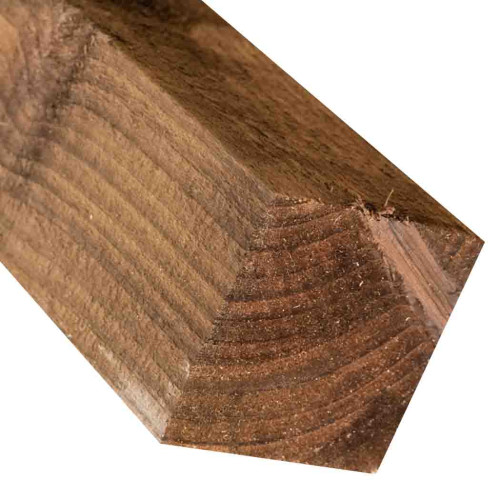
Timber Fence Posts
Timber posts provide:
- A natural appearance
- Relatively straightforward handling
- Simple drilling and fixing
- Easy adjustment for shortened bays
- Compatibility with panel clips and brackets
Common square sections include 75 x 75mm and 100 x 100mm, with lengths such as 1.8m, 2.4m and 3.0m.
Timber posts installed in the ground should be pressure treated for the intended exposure. Treatment colour alone does not establish that a post is suitable for ground contact.
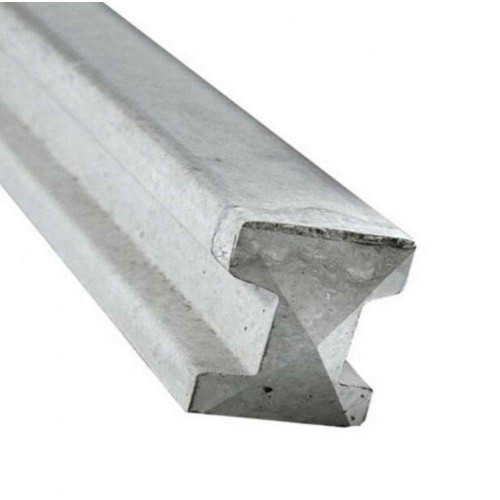
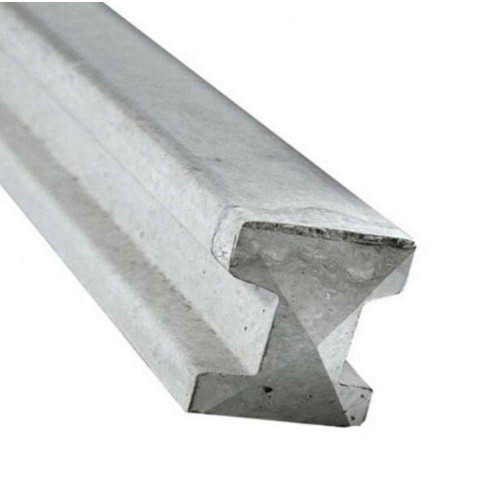
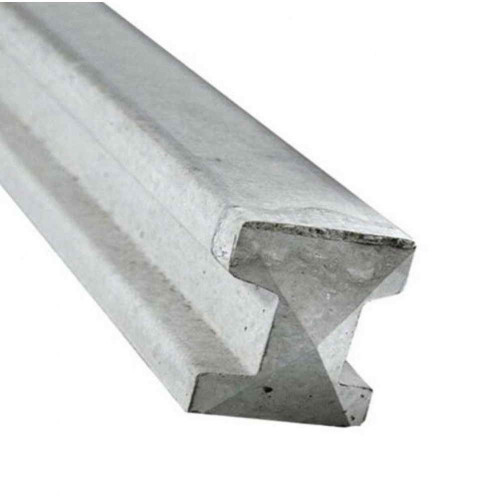
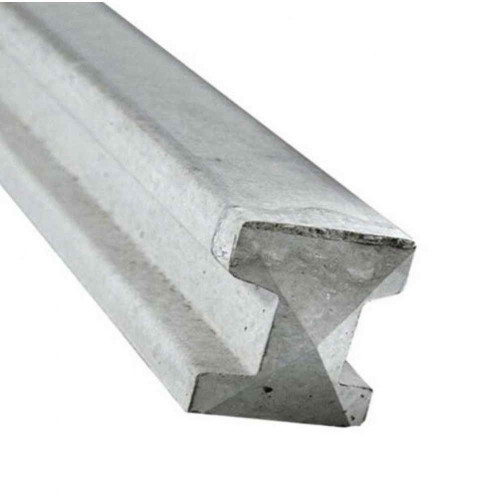
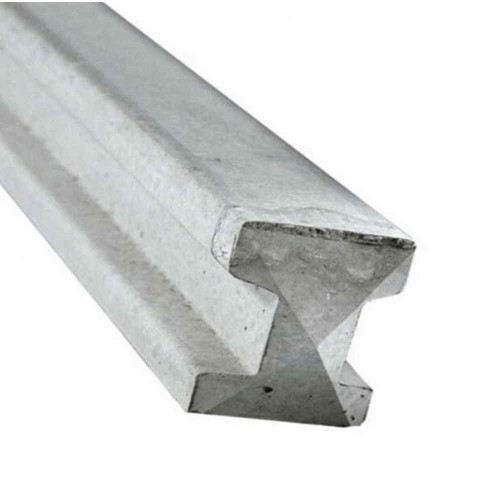
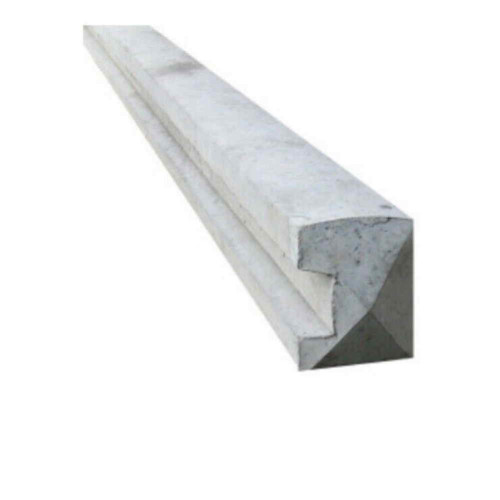
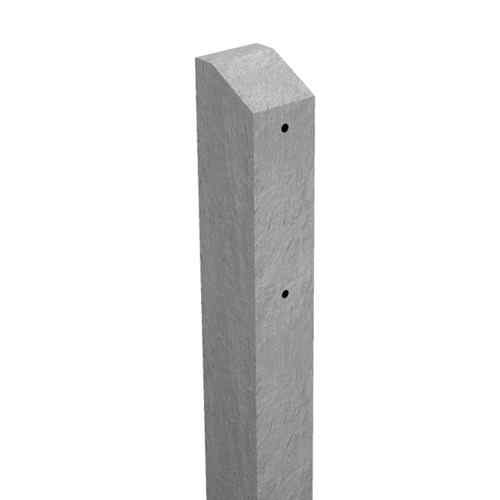
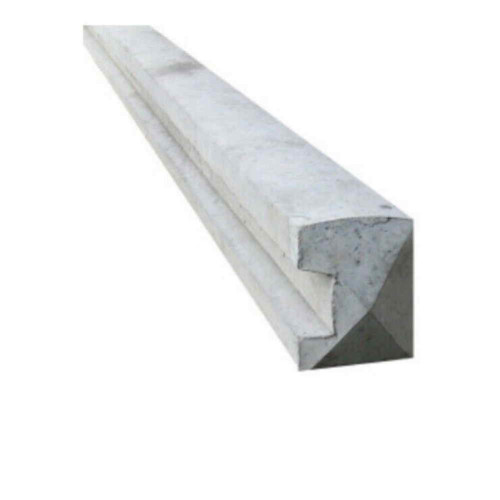
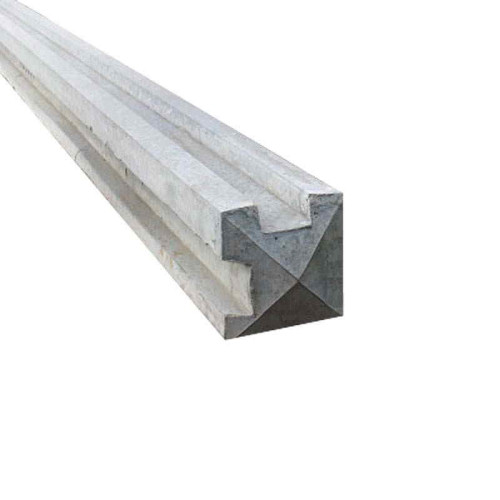
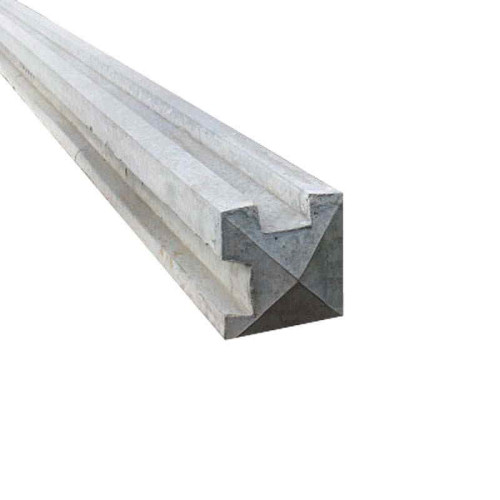
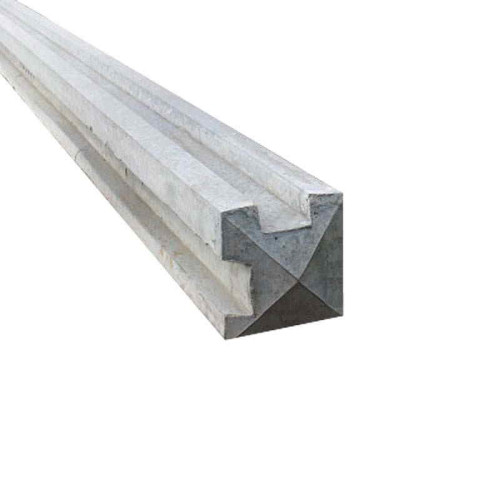
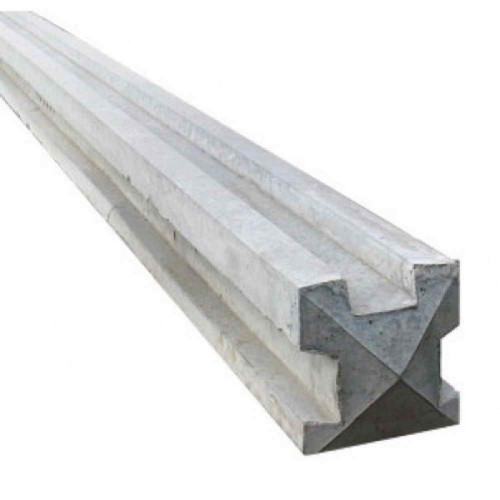
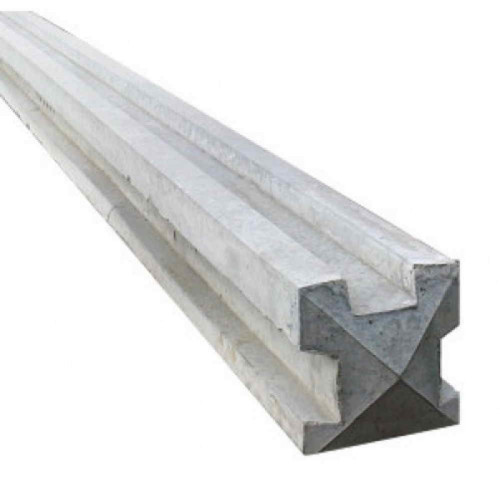
Concrete Fence Posts
Concrete posts provide:
- Resistance to rot
- Limited routine maintenance
- Compatibility with removable framed panels
- Compatibility with concrete gravel boards
Concrete posts are considerably heavier and more awkward than timber. Installation should be planned to avoid uncontrolled lifting, twisting or dropping.
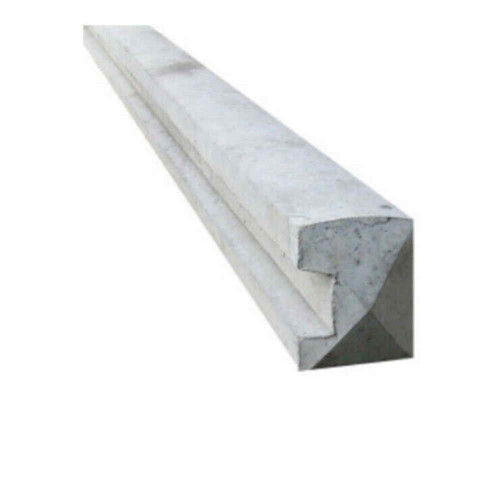
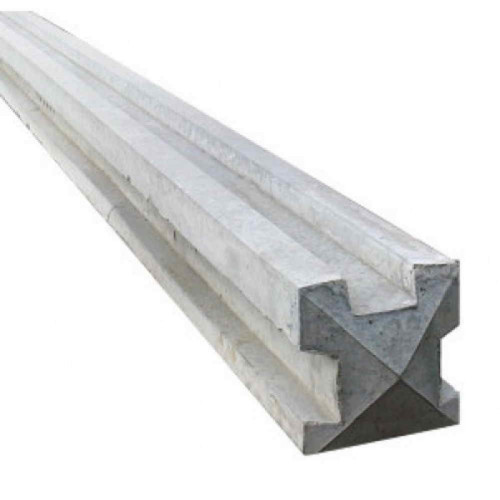
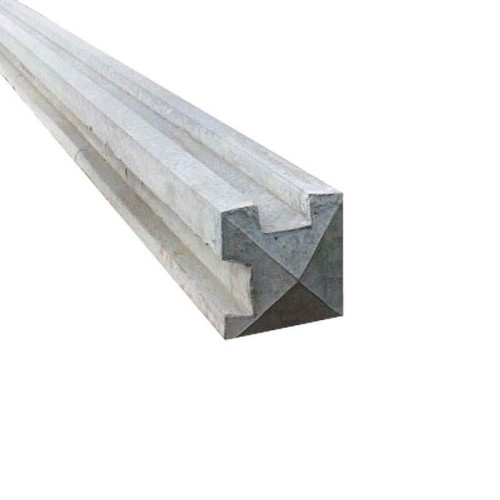
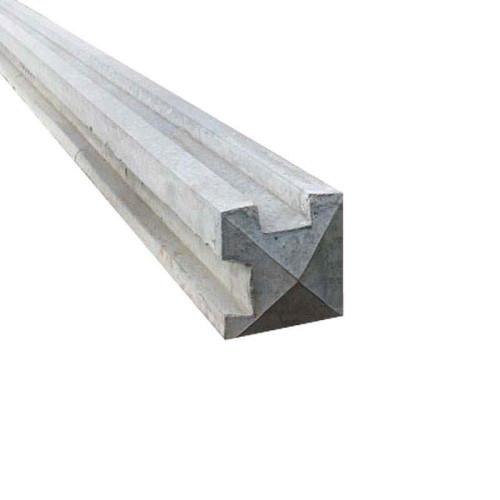
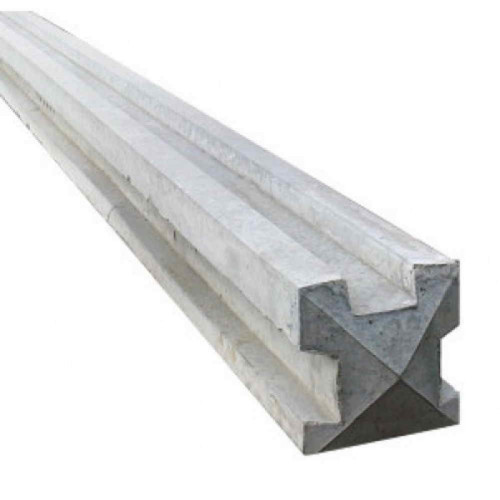
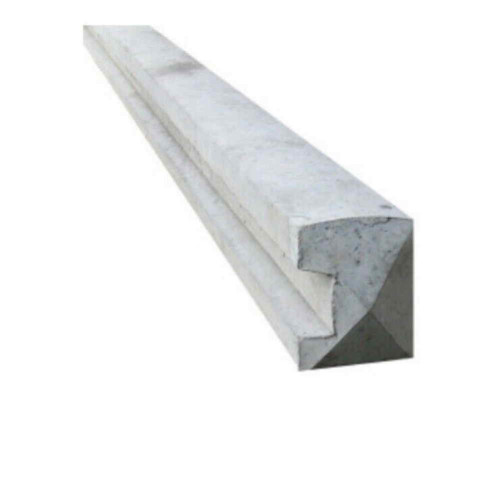
Different positions require different post configurations, including intermediate, end, corner and three-way posts.
Which Fence Post Size Should You Use?
The appropriate post size depends on the fence height, panel design, wind exposure and ground conditions.
| Post Type | Typical Application | Important Limitation |
|---|---|---|
| 75 x 75mm timber | Selected low or lightweight fencing | May be insufficient for demanding full-height boundaries |
| 100 x 100mm timber | Full-height panels and more substantial fences | Still requires suitable length and foundations |
| Slotted concrete post | Framed panels with compatible gravel boards | Heavy and dimensionally less adaptable on site |
| 150 x 150mm timber gate post | Substantial framed garden gates | Gate weight and site conditions must still be assessed |
Do not choose the smallest available post merely to reduce material costs. An undersized post can allow the fence to move even where the foundation is otherwise sound.
How Long Should Fence Posts Be?
Post length must include both the visible fence height and the section installed below ground.
Calculate the required length from:
- Panel height
- Gravel-board height
- Trellis height
- Any intended projection above the panel
- The required below-ground support
- Changes in ground level
For example, a 1.8m panel installed above a 150mm gravel board already creates a visible fence height of approximately 1.95m before allowing for any post projection.
A 1.8m post would clearly be unsuitable for that arrangement because it provides no useful below-ground support.
How Deep Should Fence Post Holes Be?
There is no single post-hole depth suitable for every fence.
As a practical starting point, many ordinary domestic installations use approximately:
| Fence Type | Common Starting Depth | When More Support May Be Needed |
|---|---|---|
| Low decorative fencing | Around 450mm | Weak soil or exposed position |
| Full-height panel fencing | Around 600mm | Solid panels, exposed ground or poor soil |
| Heavy gate or highly exposed fence | Site-specific design required | Gate leverage, wind and unstable ground |
These figures are starting points rather than universal requirements.
The final depth and foundation dimensions depend on:
- Fence height
- Post section
- Panel weight
- Panel solidity
- Soil strength
- Wind exposure
- Foundation width
- Gate loads
A narrow, shallow hole should not be used simply because the timber post is long enough to reach the required visible height.
How Wide Should A Fence Post Hole Be?
The hole must leave enough space around the post for the foundation material to form a substantial, continuous support.
A practical domestic starting point is often a hole approximately three times the post width. However, the required width increases with:
- Post size
- Fence height
- Wind exposure
- Weak or made-up ground
- Gate loads
A hole that is too narrow provides little foundation material around the post. An unnecessarily large hole increases excavation and material use without automatically improving the installation.
Which Tools And Materials Will You Need?
A typical panel-fence installation may require:
- Fence posts
- Fence panels or rails and boards
- Gravel boards
- Rapid-set post mix or suitable concrete
- Exterior screws or nails
- Panel clips or security brackets
- Cut-end timber treatment
- Strong setting-out stakes
- String line
- Tape measure
- Long spirit level
- Post-hole digger
- Spade
- Digging bar
- Shovel
- Saw
- Drill or impact driver
- Temporary timber braces
- Water where required by the foundation product
- Suitable personal protective equipment
Old foundations may also require suitable concrete-breaking equipment.
Do not begin mechanical breaking until the possible position of underground services has been assessed.
Step 1: Confirm The Boundary Position
Do not assume that an old or damaged fence follows the exact legal boundary.
Before removing it:
- Check the available title documents
- Review any previous boundary agreement
- Confirm ownership of the existing structure
- Speak to the adjoining neighbour
- Record the current fence position with photographs
Fence posts should not be moved into neighbouring land simply to avoid an old foundation, root or awkward section of ground.
Where the boundary is actively disputed, stop and obtain appropriate professional advice before excavation.
Step 2: Check Fence Height And Property Restrictions
The completed height includes:
- The gravel board
- The main panel
- Trellis
- Capping
- Any other permanent topper
For properties in England, a fence, gate or wall can generally be erected without planning permission where it does not exceed:
- 1m beside a highway used by vehicles or its associated footpath
- 2m elsewhere
Exceptions can affect listed properties, conservation areas, Article 4 directions, planning conditions and neighbouring listed buildings.
Different rules and procedures apply in Wales, Scotland and Northern Ireland.
Also check restrictive covenants, estate rules and open-plan frontage requirements. Planning permission and private property restrictions are separate matters.
Step 3: Identify Possible Underground Services
Fence-post excavation can damage buried electricity cables, gas services, water pipes, drains, communications cables and private garden wiring.
The risk is greater near:
- Houses and extensions
- Garages
- Outdoor sockets
- Garden lighting
- Electric gates
- Water taps
- Drain covers
- Driveways
- Previous outbuildings
A safe approach includes:
- Planning the excavation before work starts.
- Obtaining and reviewing available service information.
- Using suitable locating equipment where appropriate.
- Marking suspected service routes.
- Using a safe digging method.
Do not assume that a cable or pipe follows a straight, predictable route.
If an unidentified object, tape, duct, cable or pipe is encountered, stop excavation and establish what it is before continuing.
Step 4: Remove The Existing Fence Safely
Remove loose panels first, working in manageable sections.
Wear suitable gloves and eye protection because old fencing can contain:
- Protruding nails
- Corroded screws
- Broken concrete
- Sharp wire
- Splintered timber
Support unstable sections before disconnecting them. Do not leave a partly dismantled fence where it could fall into neighbouring property or a public area.
Old timber posts may be:
- Pulled from loose ground
- Excavated with the foundation
- Cut and removed in sections
- Broken out from surrounding concrete
Remove enough of the old post and foundation to create a sound, correctly positioned hole for the replacement.
Step 5: Clear And Prepare The Fence Line
Remove items that obstruct accurate setting out, including:
- Loose soil
- Stored materials
- Plant pots
- Dead vegetation
- Old fixings
- Broken concrete
Cut back plants only where you have the right to do so. Do not remove a neighbour's plants or enter their garden without permission.
Keep mature trees and substantial roots in mind when positioning the new foundations. Cutting major roots can damage the tree and create stability issues.
Step 6: Establish The Fence Line With String
Install firm setting-out stakes beyond the first and last post positions where space allows.
Run a tight string line between them to represent a consistent face of the posts.
Decide whether the string indicates:
- The front face of the posts
- The centre line
- The outer boundary face
Use the same reference throughout the installation.
Set the string slightly clear of the posts rather than allowing every post to push against it. A post touching the string can displace it and introduce an error along the rest of the run.
Step 7: Position End, Corner And Gate Posts First
Mark the principal structural positions before laying out the intermediate bays.
These include:
- The first post
- The final post
- Every change in direction
- Both sides of a gate
- Three-way junctions
- Connections to walls or existing fences
Corner and gate positions should be settled first because they determine how the remaining panels fit.
Step 8: Measure The Actual Panel And Gravel Board
Standard framed panels are commonly described as nominally 6ft or 1.83m wide, but actual measurements can vary.
Measure:
- The complete panel width
- The panel-frame thickness
- The gravel-board length
- The depth of any concrete-post slot
- The thickness of clips or brackets
For timber posts, calculate whether the panel will sit:
- Between the posts
- On the face of the posts
- Inside panel clips
For slotted concrete posts, allow enough engagement inside both slots without making the bay so narrow that the panel must be forced into place.
Step 9: Calculate Every Post Position
Do not set all post centres by multiplying a nominal panel width.
The completed bay may include:
- The panel width
- The post width
- Clip or bracket clearance
- Concrete-slot engagement
Work from a fixed starting point and mark each hole individually.
Where the complete run does not divide evenly into standard bays, plan the shortened panel deliberately. It is often best placed near an end or less prominent section, depending on the layout.
Step 10: Mark The Post Holes
Use marker paint, stakes or another clear method to mark the centre of each excavation.
Before digging, check:
- The total run length
- The panel count
- The gate width
- All corners
- The final shortened bay
- Clearance from walls and structures
It is much easier to move a marker than a post surrounded by hardened concrete.
Step 11: Dig The First Post Hole
Start with an end, corner or gate post.
Keep the hole:
- In the correct position
- Reasonably vertical
- Wide enough for foundation material
- Deep enough for the planned support
- Clear of loose debris
Place excavated soil where it cannot fall back into the hole or overload the edge of a larger excavation.
If the ground crumbles badly or fills with water, stop and reassess the foundation method.
Step 12: Deal With Old Concrete And Obstructions
Old post foundations often occupy the exact positions needed for the replacement fence.
Possible approaches include:
- Breaking out the complete old foundation
- Excavating around and removing it
- Redesigning the bay layout where the boundary permits
- Using a suitable repair system for a local post failure
Do not position every new post slightly to one side without checking how the accumulated change affects the boundary and final panel spacing.
Stop if breaking concrete reveals an unknown cable, pipe, duct or other object.
Step 13: Prepare The Bottom Of The Hole
Remove loose soil and standing debris from the base.
Some timber-post installations use a modest layer of compacted drainage aggregate beneath the post. This may help prevent water sitting directly beneath the timber, but it does not replace:
- Adequate post depth
- Suitable ground-contact treatment
- A substantial foundation
- Surface drainage
Do not add so much aggregate that the effective below-ground post length becomes inadequate.
Step 14: Position The First Post
Lower the post into the hole carefully.
For concrete posts, use an appropriate number of people or suitable handling aids. The size, shape, grip, route and repeated nature of the handling are all relevant, not just the stated weight.
Position the post against the chosen string-line reference.
Check:
- The correct visible height
- The alignment along the boundary
- The orientation of concrete slots
- The position of gate hinge faces
- The direction of any post-top profile
Step 15: Check The Post Is Plumb
A post is plumb when it is vertically upright.
Place the spirit level on two adjacent faces.
Check both directions because a post can appear upright from the front while leaning along the fence line.
For concrete posts, check a consistent manufactured face rather than relying on a chipped or irregular edge.
Step 16: Brace The Post Securely
Temporary bracing prevents the post from moving while the foundation material is added and begins to set.
A practical bracing arrangement may use:
- Two timber braces
- Stakes driven into stable ground
- Clamps or temporary screws for timber posts
Position the braces in different directions so they control movement both along and across the fence line.
Recheck the post after tightening the braces.
Step 17: Add Rapid-Set Post Mix Or Concrete
Follow the instructions supplied with the chosen foundation product.
Rapid-set post mix is convenient for many domestic installations because it avoids separately batching traditional concrete.
The correct process varies by product. It may require:
- Adding water to the hole first
- Adding dry mix and then water
- Mixing before placement
- A specific water quantity
Do not assume every bag is used in the same way.
Add the material evenly around the post. Avoid pushing the post out of position while pouring or tamping.
Step 18: Recheck Height, Plumb And Alignment
Immediately after adding the foundation material, check:
- The visible post height
- Plumb in both directions
- Alignment with the string
- The orientation of slots or fixing faces
Make corrections while the material remains workable.
Once rapid-set material begins to harden, forcing the post into a new position can weaken or separate the developing foundation.
Step 19: Finish Around A Timber Post To Shed Water
Where foundation material reaches the surface around a timber post, finish it so rainwater is encouraged to flow away.
A hollow or bowl around the post can retain water at ground level.
Do not later bury the finished foundation beneath:
- Topsoil
- Mulch
- Compost
- Decorative bark
Persistent moisture around ground level can shorten the useful life of the timber.
Step 20: Position The Second Post Accurately
The second post determines whether the first panel or gravel board will fit.
Use the actual product dimensions or a rigid setting-out spacer.
Possible methods include:
- Using a timber spacer cut to the required clear bay width
- Temporarily positioning a gravel board
- Temporarily positioning a framed panel with support
- Measuring between post faces or concrete slots
Do not leave a heavy panel unsupported while the post foundations are fresh.
Where a panel is used as a spacing guide, remove or support it according to the setting requirements of the foundation material.
Step 21: Continue One Bay At A Time
For most domestic panel fences, setting and checking one bay at a time is more reliable than digging every hole and hoping the measurements remain accurate.
For each post:
- Confirm the next bay measurement.
- Mark the hole.
- Excavate safely.
- Position the post.
- Check the height and alignment.
- Brace it.
- Add the foundation material.
- Recheck every measurement.
Step back regularly and inspect the complete run. Small errors are easier to see from a distance.
How Do You Install Concrete Fence Posts?
The general setting-out process is the same, but concrete posts require additional attention to handling and slot spacing.
For a typical slotted system:
- Set the first post upright and secure it.
- Measure the required clear bay width.
- Excavate the second hole.
- Position the second post with both slots facing correctly.
- Temporarily check the fit of the gravel board or spacing gauge.
- Brace the post.
- Add the foundation material.
- Recheck slot alignment and post spacing.
Concrete posts should not be dropped into holes. Impact can chip the slots or damage the base.
How Do You Install Timber Fence Posts?
For a timber panel system:
- Position the pressure-treated post in the prepared hole.
- Set the required visible height.
- Align the fixing face with the string line.
- Check the post is plumb.
- Brace it securely.
- Add the foundation material.
- Finish the surface to shed water.
- Allow sufficient setting time before fixing panels.
Use clips, brackets or exterior screws through substantial parts of the panel frame.
Do not fix a panel only through thin boards or decorative slats.
How Should Corner Posts Be Installed?
A corner post supports fence sections running in different directions.
Before setting it:
- Establish both fence lines
- Confirm the corner angle
- Check the correct post configuration
- Allow for the fixing method on both faces
A timber corner may require a larger post section because panels or rails are fixed from two directions.
A concrete system requires a post manufactured with the appropriate slot arrangement.
How Should End Posts Be Installed?
An end post must provide a secure finishing point and may receive different loading from an intermediate post.
Check:
- Its distance from a wall or structure
- Whether access is available for fixings
- Whether the end panel needs shortening
- Whether the post requires an end-slot configuration
Do not place the post so close to a wall that the panel cannot be installed or removed later.
How Should Gate Posts Be Installed?
Gate posts require more substantial foundations because a gate creates leverage and repeated movement.
Plan the gate before setting either post.
Confirm:
- The exact gate width
- The clearance required for hinges and latch
- The opening direction
- The finished ground level
- The gate's lower clearance
- The hinge-post position
- The closing-post position
A dedicated gate post may measure 150 x 150mm and 3.0m long, although the appropriate specification depends on the gate and site.
Do not hang a substantial framed gate from a lightweight post intended only for ordinary fence panels.
Which Way Should A Gate Brace Face?
The correct brace arrangement depends on the gate construction.
For a traditional ledged-and-braced timber gate, the diagonal brace should normally transfer load from the lower hinge area towards the upper closing side.
This helps place the brace in compression under the gate's weight.
Fully framed gates may use a different structural arrangement, so follow the design of the gate rather than adding or reversing bracing without understanding its purpose.
How Long Should Posts Set Before Panels Are Fitted?
Follow the instructions for the actual post mix or concrete being used.
A product becoming firm does not necessarily mean it has reached its full working strength.
The required waiting period is affected by:
- The foundation product
- Temperature
- Water quantity
- Ground moisture
- Panel weight
- Wind conditions
- Whether a gate will be hung
Avoid fitting heavy panels or gates prematurely, especially in strong wind.
When Should Gravel Boards Be Installed?
Gravel boards are normally fitted before the main panels.
They help protect timber panels from:
- Wet soil
- Grass
- Mud splash
- Fallen leaves
- Strimmer damage
Concrete Gravel Boards
In a slotted concrete-post system, lower the gravel board carefully into the slots once the posts can support it.
Ensure it is fully supported and not being forced into a bay that is too narrow.
Wooden Gravel Boards
Wooden boards can be fixed to timber posts using suitable cleats, brackets or exterior fixings.
Protect any fresh cuts according to the timber-treatment guidance.
How Are Fence Panels Fitted To Timber Posts?
Panel clips provide a defined connection between the frame and post and can make later replacement easier.
Before fixing:
- Support the panel at the intended height
- Check it is level
- Confirm consistent clearance
- Locate substantial parts of the outer frame
Use sufficient fixings at several heights for tall panels.
Fixing only through the centre of a full-height panel can allow the top and bottom to move excessively.
How Are Panels Fitted Between Concrete Posts?
After the gravel board is installed, the framed panel is normally lowered into the slots.
This is generally a two-person task because a full-size panel is broad, catches wind and can be damaged if twisted.
Check that:
- The panel frame fits the slot
- Both sides have sufficient engagement
- The panel rests fully on the gravel board
- The posts are not being forced apart
Do not plane, crush or force a substantial frame into a slot without confirming compatibility.
How Are Rails Installed For Traditional Closeboard Fencing?
Traditional closeboard fencing is assembled from posts, rails and individual feather edge boards.
After the posts have developed sufficient stability:
- Mark the rail positions consistently.
- Cut rails to fit between or across the posts.
- Protect fresh timber cuts.
- Fix the rails securely.
- Install the gravel board.
- Fix feather edge boards with a controlled overlap.
Cant rails commonly have an angled profile that helps shed water and provides a fixing face for the feather edge boards.
How Do You Install Fence Posts On A Slope?
First decide whether the fence will be stepped or raked.
Stepped Panels
Rigid framed panels remain level while each bay changes height.
This requires:
- Careful visible post-height calculations
- Longer posts at selected points
- A planned step between bays
- Management of gaps beneath the lower corners
Raked Closeboard Fencing
Individual feather edge boards can follow the ground more closely.
The posts remain upright while rails and boards are arranged to suit the slope.
Do not reduce below-ground support merely because one post stands on higher ground.
How Do You Install Posts Near A Wall?
Before excavating near a wall, consider:
- The wall foundation
- Drainage
- Possible cables and pipes
- Access for digging
- Whether the new post could undermine the structure
A timber wallplate or other fixing may be suitable in selected situations, but the wall must be capable of accepting the loads.
Do not attach a full-height fence to weak masonry, a decorative wall or neighbouring property without proper assessment and permission.
Can Posts Be Installed On Concrete Or Paving?
Bolt-down post supports can be used in selected applications where the existing concrete base is structurally suitable.
They may suit:
- Low screens
- Light picket fencing
- Selected garden divisions
They are not automatically suitable for full-height solid privacy panels.
The base, anchors, post support, panel height and wind exposure must all be assessed together.
Do not fix through paving slabs alone and assume the result is equivalent to a substantial in-ground foundation.
Can Drive-In Post Spikes Be Used?
Drive-in spikes can avoid burying timber directly in the soil and are available for common timber-post sections.
They may be useful for suitable lightweight applications in ground that allows accurate driving.
Limitations include:
- Difficulty maintaining alignment
- Obstruction by stones and roots
- Limited suitability for weak ground
- Reduced performance with tall solid panels
- Difficulty confirming buried services
A spike should not be selected simply because it is quicker than digging a suitable foundation.
Can A Concrete Repair Spur Replace A New Post?
A concrete repair spur can reinforce a timber post that has failed around ground level while remaining sound above.
The usual process involves:
- Supporting the fence.
- Excavating beside the failed post.
- Positioning the repair spur.
- Setting it into a suitable foundation.
- Bolting it to sound timber above the decayed section.
A repair spur is not suitable where the post is extensively rotten, split or unable to hold secure bolts.
How Should Fresh Timber Cuts Be Protected?
Cutting a pressure-treated post, rail or board may expose less-protected internal timber.
Apply an appropriate cut-end or end-grain treatment where required.
Pay particular attention to:
- Post tops
- Shortened rails
- Cut gravel boards
- Notches
- Shortened framed panels
Where possible, avoid cutting away the factory-treated end intended for ground contact.
How Do You Shorten A Framed Fence Panel?
Do not simply cut through the boards and leave the ends unsupported.
A better process is:
- Mark the required finished width.
- Fit or reposition a substantial side frame.
- Secure every board or slat to that frame.
- Cut away the excess material.
- Protect fresh timber cuts.
The exact method depends on the panel design. Decorative lattice, hit and miss, double slatted and curved panels can be difficult to reduce neatly.
Common Fence Post Installation Mistakes
- Digging before checking for underground services
- Assuming the old fence marks the exact boundary
- Buying posts that are too short
- Using undersized posts
- Using one standard hole depth for every site
- Setting the first post without planning the final bay
- Assuming every panel is exactly 1.83m wide
- Forgetting post width in the total run
- Allowing posts to push the string line aside
- Checking plumb in only one direction
- Failing to brace posts
- Using the wrong water quantity in post mix
- Loading fresh foundations too quickly
- Allowing concrete to form a water-holding bowl
- Setting timber panels directly on wet soil
- Using ordinary panel posts for heavy gates
- Forcing panels between incorrectly spaced posts
- Leaving fresh timber cuts unprotected
Fence Post Installation Checklist
Before work starts:
- Confirm the boundary and fence ownership
- Check planning and property restrictions
- Identify possible underground services
- Select the panel and gravel-board system
- Choose compatible posts
- Calculate post length and foundation requirements
- Plan gate and corner positions
- Arrange safe handling for heavy materials
During setting out:
- Install firm stakes
- Run a tight string line
- Measure actual panels and boards
- Mark every post hole
- Check the final shortened bay
During installation:
- Excavate using a safe method
- Remove loose material from each hole
- Position the post at the correct height
- Check plumb in two directions
- Brace the post
- Follow the foundation-product instructions
- Recheck alignment before the mix hardens
- Finish timber-post foundations to shed water
Before fitting panels:
- Allow sufficient setting time
- Confirm every bay width
- Fit gravel boards first
- Use exterior-grade fixings
- Protect fresh timber cuts
- Check the completed fence height
FAQs
How Deep Should A 6ft Fence Post Be?
Around 600mm is a common starting point for many ordinary full-height domestic fences, but exposed locations, weak soil, heavy panels and gates can require a more substantial foundation.
Is Two Feet Deep Enough For A Fence Post?
Approximately 600mm may be suitable for selected standard installations. It should not be treated as a universal answer regardless of soil, height or wind exposure.
How Deep Should A 4ft Fence Post Be?
Around 450mm may be used as a starting point for selected low fencing, subject to post size, soil and exposure.
How Wide Should A Post Hole Be?
A practical starting point is approximately three times the width of the post, with larger foundations considered for heavy or exposed fencing.
How Far Apart Should Fence Posts Be?
The spacing is determined by the actual panel, gravel board and fixing system. Standard panels are commonly nominally 1.83m wide, but the actual products must be measured.
How Many Posts Are Needed For Six Panels?
A straight six-panel run normally requires seven posts. Corners, gates and separate sections can change the count.
Can Fence Posts Be Installed Without Concrete?
Some lightweight installations use driven posts or metal supports. Full-height panel fencing normally requires a substantial foundation appropriate to the ground and wind loading.
Is Rapid-Set Post Mix Suitable For Fence Posts?
It is commonly used for domestic fence-post foundations. Follow the manufacturer's mixing, water and setting instructions.
How Many Bags Of Post Mix Are Needed Per Post?
The quantity depends on hole dimensions, post size and the specific product yield. Calculate the actual hole volume and follow the bag guidance rather than assuming one bag is always enough.
Should Gravel Be Put Under A Timber Post?
A modest drainage layer can be used in some installations, but it should not reduce the required post depth or replace suitable treatment and foundations.
Should Concrete Reach Ground Level?
The final detail depends on the system, but surface water should not be encouraged to collect against a timber post.
Should Timber Posts Be Wrapped Before Concreting?
Do not add an unverified wrapping that could trap moisture or interfere with the intended treatment system. Use timber specified for ground contact and follow any supplied installation guidance.
Can You Put A New Post Into An Old Concrete Hole?
Only where the old foundation can be removed or adapted to create a sound, correctly positioned new foundation. A loose post placed into an oversized old socket is not adequate.
Can Existing Concrete Posts Be Reused?
Yes, if they are upright, stable, undamaged and correctly spaced for the new panels and gravel boards.
Can Existing Timber Posts Be Reused?
Yes, where they are secure, correctly spaced and free from serious ground-level decay.
Can Concrete Repair Spurs Be Used On Rotten Posts?
They can reinforce selected posts that remain sound above the failed base. Extensively rotten posts should normally be replaced.
How Do You Keep Fence Posts In A Straight Line?
Use firm setting-out stakes, a tight string line and a consistent reference face. Recheck the line after setting every post.
How Do You Check A Post Is Upright?
Place a spirit level on two adjacent faces and adjust until both readings show the post is plumb.
Should All Post Holes Be Dug First?
They can be, but setting one bay at a time often reduces spacing errors, particularly when framed panels and concrete posts are being used.
Can Fence Panels Be Used As Spacers?
They can help confirm spacing, but they should be supported carefully and should not place heavy loads on fresh foundations.
How Soon Can Panels Be Installed?
Follow the foundation-product instructions and consider panel weight, weather and exposure. Firm material may not yet have reached full working strength.
Can Fence Posts Be Installed In Rain?
Light rain may not prevent every installation, but waterlogged holes, unstable sides and product-specific moisture restrictions can make work unsuitable. Follow the foundation guidance and stop if conditions prevent safe, accurate installation.
Can Concrete Posts Be Installed By One Person?
The risk depends on the post dimensions, route, grip and individual capability. Concrete posts are heavy and awkward, so suitable assistance or handling equipment is normally appropriate.
Do Gate Posts Need Deeper Foundations?
They frequently require more substantial foundations because a gate creates moving loads and leverage. The design should reflect the gate size, weight, ground and exposure.
Can A Standard Fence Post Support A Gate?
A small, lightweight gate may suit a correctly specified post, but substantial framed gates generally need dedicated larger gate posts.
Can Bolt-Down Supports Hold A 6ft Fence?
They should not be assumed suitable for tall solid panels. The concrete base, anchors, wind exposure and complete support system require assessment.
Can Drive-In Spikes Be Used For Full-Height Panels?
They may not provide adequate support in many full-height or exposed installations. Use them only where the product and site are suitable for the intended load.
Should Freshly Cut Treated Timber Be Retreated?
Fresh cuts may expose less-protected timber and should receive a suitable cut-end treatment where required.
Why Is My New Fence Post Leaning?
Possible causes include inadequate foundations, movement before setting, weak ground, poor alignment, waterlogging or excessive wind loading.
Why Will My Panel Not Fit Between The Posts?
The bay may be too narrow, the panel may be wider than assumed, the posts may lean or the concrete slots may be incompatible with the frame thickness.
Should Fence Panels Touch The Ground?
Timber panels should normally be kept clear of wet soil using gravel boards or controlled ground clearance.
Build The Fence From The Ground Up
A strong fence begins with accurate planning rather than the first spadeful of soil.
Confirm the boundary, completed height and product specification before setting out the post positions. Assess underground services and do not excavate on assumptions about where cables and pipes ought to run.
Choose posts that suit the fence rather than selecting them by price or visible height alone. Full-height solid panels, exposed boundaries and gates place greater loads on their supports than low, open fencing.
Set out the line carefully, measure the actual panels and work one bay at a time. Every post should be checked for height, alignment and plumb before the foundation material hardens.
Allow the foundations to develop suitable strength before adding heavy components. Fit compatible gravel boards, panels, rails and exterior fixings, then protect all fresh timber cuts.
Care invested in the posts makes the remaining fence easier to install and reduces the risk of leaning panels, dragging gates and premature repairs.