Fence Posts
Fence posts form the main support for garden fencing, holding panels, rails and gates securely in position. East Coast Fencing supplies wooden fence posts and concrete fence posts for new boundaries, replacement fencing and repair work. Our range includes different lengths, sections and post types to suit low garden fencing, full-height privacy fences and more demanding layouts.
Choosing the right fence post depends on the height and weight of the fencing, the ground conditions and the finish you want. Posts must be long enough to support the visible fence while allowing a suitable section to be set below ground. Use our fence post length calculator to estimate the length required for your panels, gravel boards and any trellis fitted above the fence.
Wooden Fence Posts
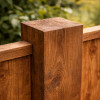
Wooden fence posts provide a natural finish that works well with timber fence panels, rails, trellis and garden gates. They are straightforward to cut, drill and fix into, making them a practical choice for both panel fencing and traditional timber-built fence runs.
Our timber fence posts are pressure treated for outdoor use, helping to protect the wood against rot and fungal decay. They are available in brown and green or natural treated finishes, with different lengths and sections to suit lighter garden projects and stronger fencing installations.
75mm and 100mm Wooden Fence Posts
Posts measuring 75mm x 75mm are commonly used for lighter fencing, trellis and general garden projects. Their slimmer section gives a neat appearance and is suitable where the fence does not require the heavier support of a larger post.
Posts measuring 100mm x 100mm provide a more substantial section for heavier fence panels, taller boundaries and installations where greater strength is needed. The correct size will depend on the fence design, exposure and ground conditions, so the post should be chosen for the complete installation rather than the panel height alone.
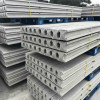
Concrete Fence Posts
Concrete fence posts are a strong, low-maintenance option for garden boundaries and panel fencing. Their slotted construction allows standard fence panels and compatible gravel boards to be fitted between the posts, creating a sturdy system in which individual panels can be removed and replaced when required.
Concrete posts are particularly useful where long service life, strength and resistance to ground-level decay are important. They are heavier than timber posts and require careful handling, but they provide a rigid structure for both straight fence runs and more complex boundary layouts.
Intermediate, End and Corner Fence Posts
Intermediate concrete posts are used along straight sections of fencing, with slots on opposite sides to hold the adjoining panels. End posts have a single slot and are used where a fence run finishes against an open boundary, wall or gateway.
Corner posts allow the fencing to change direction, while three-way posts are used where three separate fence runs meet. Choosing the correct post type at each point keeps the panels properly aligned and avoids unnecessary modifications during installation.
Concrete Repair Spurs
Concrete repair spurs can be used to reinforce timber fence posts that have weakened or rotted near ground level. The spur is installed beside the existing wooden post and secured to it, providing additional support without always needing to dismantle the complete fence run.
A repair spur can be a practical option when the panels and the upper part of the timber post remain serviceable. The condition of the full fence should still be checked before repair work begins, particularly where several posts are showing signs of movement or decay.
Choosing the Right Fence Post Length
A fence post must extend below ground as well as support the full visible height of the fence. The visible height may include the fence panel, a gravel board and any trellis panel fitted above it. As a practical guide, many standard garden fencing installations allow around 600mm of post below ground, although exposed sites, soft ground and heavier fencing may require a different approach.
For example, adding a gravel board or trellis increases the finished height and may mean moving up to the next available post length. Our fence post length calculator combines the visible parts of the fence with a below-ground allowance to provide a useful starting estimate.
Installing Fence Posts
Fence posts should be positioned accurately, kept upright and set at consistent centres so that the panels or rails fit correctly. Posts installed in the ground are commonly secured using post mix, while suitable fence post spikes and supports may be used for certain lighter timber installations.
The correct installation method depends on the post material, fence height, soil conditions and exposure. Concrete posts need a sufficiently prepared hole and stable footing, while wooden posts should be kept straight and properly supported as the post mix sets. Use our post mix calculator to estimate the quantity required for your project.
Fence Posts for Panels, Gates and Timber Fencing
Fence posts can support more than standard panels. Wooden posts are commonly used with rails and feather edge boards to build closeboard fencing on site, while dedicated gate posts provide the additional support needed for garden gates.
For a complete fencing system, match the post type and length with suitable fence panels, gravel boards, post mix and fixings. Planning the full build before ordering helps ensure that each part is compatible and that the finished boundary has the strength and appearance required.


")
")


")
")