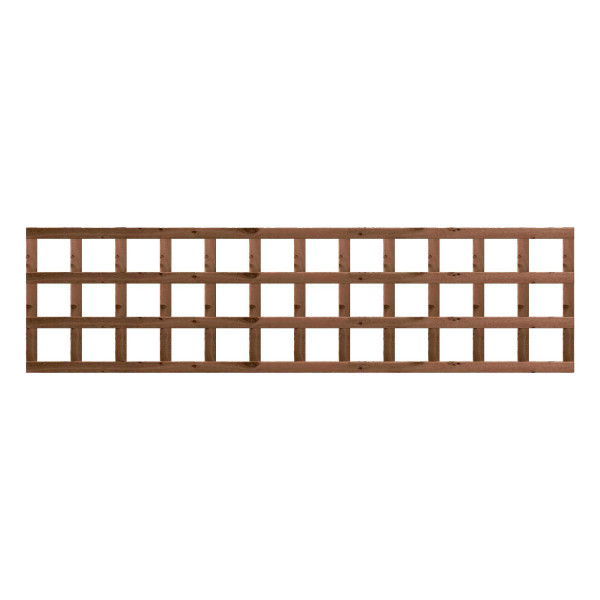
Trellis Panels
Trellis panels are the perfect addition to any garden, bringing both functionality and aesthetic appeal. Whether you're looking to create a private sanctuary, support climbing plants, or simply add a decorative feature, trellis panels offer a versatile solution. Available in various styles, these panels can be customised to suit your garden's unique character. From modern slatted designs to classic diamond patterns, there's a trellis panel for every taste.
Not only do trellis panels enhance the visual appeal of your garden, but they also serve practical purposes. They provide support for climbing plants, helping them grow vertically and freeing up ground space. This is particularly beneficial for small gardens where space is limited. Additionally, trellis panels can be used to create garden partitions, define boundaries, and even act as a windbreak.
When it comes to materials, trellis panels are typically made from wood, metal, or plastic. Wooden trellis panels offer a natural look and blend seamlessly with outdoor environments. Metal panels, on the other hand, provide a more modern and durable option, while plastic panels are lightweight and easy to maintain. Regardless of the material you choose, trellis panels are designed to withstand the elements and provide long-lasting beauty.
Installation of trellis panels is straightforward, making them an excellent DIY project for garden enthusiasts. They can be attached to walls, fences, or used as standalone structures supported by posts. With a few basic tools and some creativity, you can transform your garden into a lush, green oasis.
Horizontal Slatted Trellis Panels
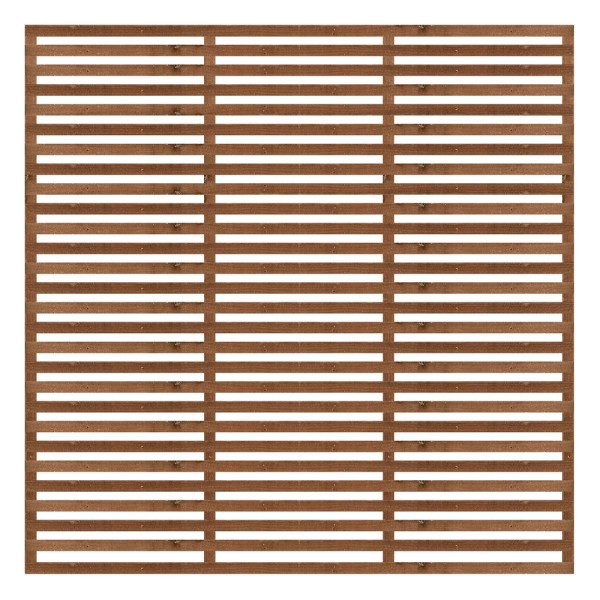
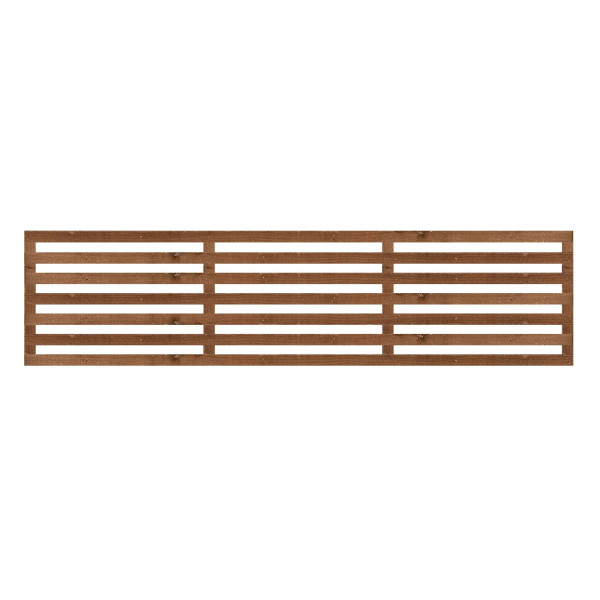
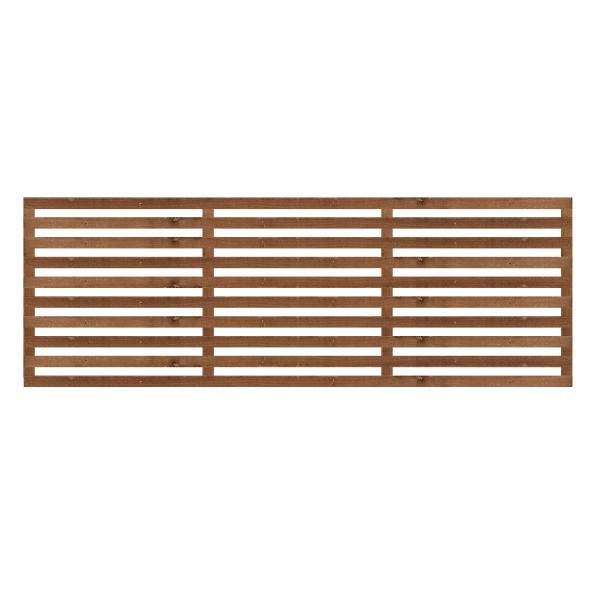
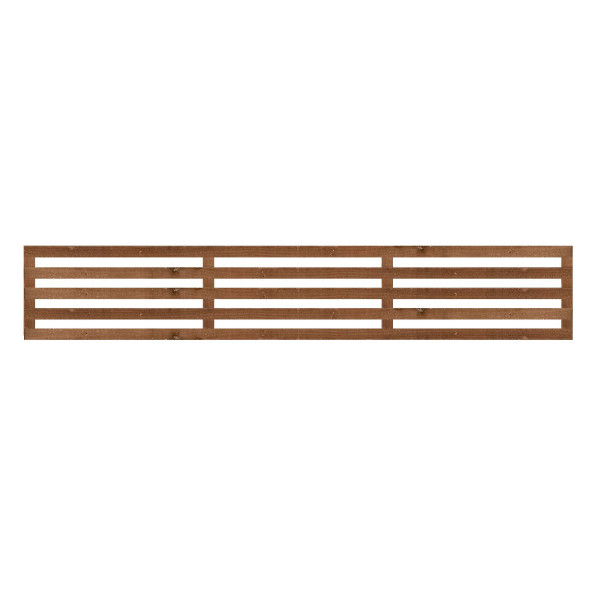
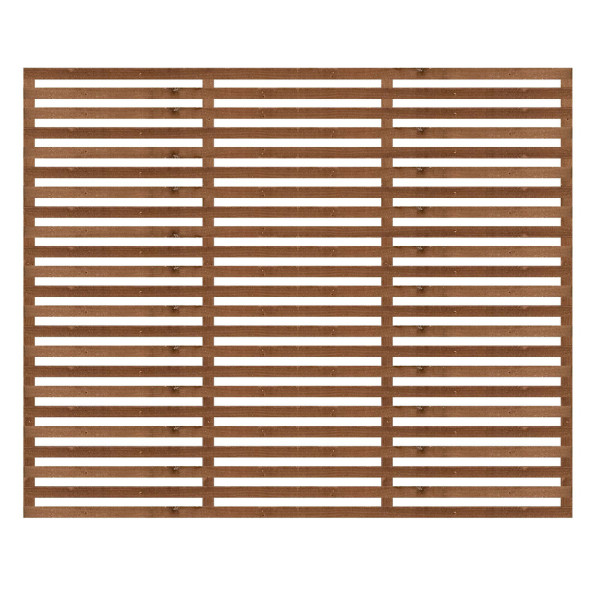
Horizontal slatted trellis panels are a modern and stylish option for contemporary gardens. Their sleek design consists of horizontal slats evenly spaced apart, creating a clean and minimalist look. These panels are perfect for adding a touch of sophistication to your outdoor space.
One of the main benefits of horizontal slatted trellis panels is their versatility. They can be used as garden screens to create private areas or as a backdrop for garden features such as water fountains or sculptures. The horizontal slats also provide excellent support for climbing plants, allowing them to weave through the gaps and create a living wall effect.
These panels are available in various materials, including wood and metal. Wooden slatted panels offer a warm and natural aesthetic, while metal ones provide a sleek and modern finish. Both options are durable and designed to withstand outdoor conditions.
Installation is a breeze with horizontal slatted trellis panels. They can be mounted onto existing fences or walls using brackets or screws. Alternatively, they can be installed as freestanding structures with the help of posts. This flexibility allows you to customise the layout and design of your garden to suit your preferences.
Maintenance of horizontal slatted trellis panels is relatively low-effort. Wooden panels may require periodic staining or sealing to protect against the elements, while metal panels can be cleaned with a simple wipe-down. With proper care, these panels will retain their beauty and functionality for years to come.
Traditional Trellis Panels
Traditional trellis panels are the epitome of classic garden design. Featuring a grid-like pattern with evenly spaced squares or rectangles, these panels add timeless elegance to any outdoor space. They are ideal for supporting climbing plants such as roses, ivy, and honeysuckle, creating a lush and vibrant display.
The charm of traditional trellis panels lies in their simplicity and versatility. They can be used as standalone garden features or integrated into existing fences and walls. Their classic design complements a variety of garden styles, from cottage gardens to formal landscapes.
Traditional trellis panels are typically made from wood, offering a natural and rustic look. Cedar and pressure-treated pine are popular choices due to their durability and resistance to rot and insects. These panels can be left to weather naturally or painted to match your garden's colour scheme.
Installing traditional trellis panels is straightforward and can be done with basic tools. They can be attached to walls or fences using brackets, or installed as freestanding structures with the help of posts. This flexibility makes them suitable for various garden layouts and designs.
Maintaining traditional trellis panels involves occasional cleaning and sealing to protect the wood from the elements. With proper care, these panels will continue to enhance your garden's beauty and functionality for many years.
Diamond Trellis Panels
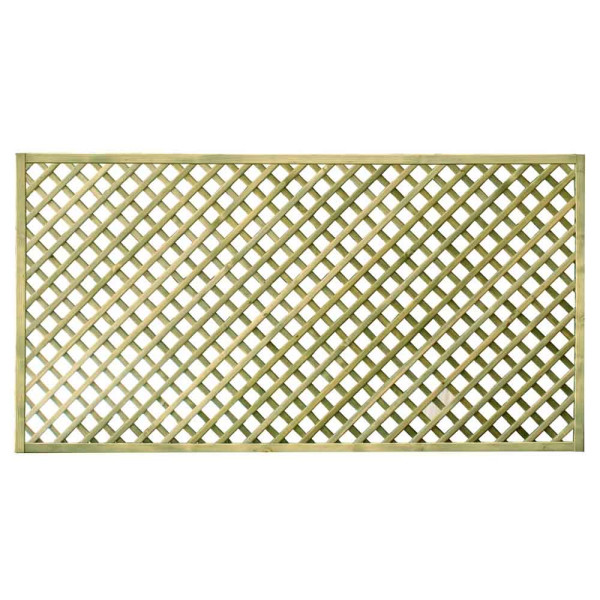
Diamond trellis panels are a popular choice for adding a touch of elegance and sophistication to any garden. Featuring a crisscross pattern of diagonal slats, these panels create a visually appealing diamond-shaped design. They are perfect for supporting climbing plants and adding a decorative element to your outdoor space.
One of the main advantages of diamond trellis panels is their ability to create a sense of depth and dimension in the garden. The diamond pattern draws the eye and adds visual interest, making these panels a focal point in any garden setting.
Diamond trellis panels are typically made from wood, which blends seamlessly with the natural surroundings. Cedar and pressure-treated pine are common materials due to their durability and resistance to rot and decay. These panels can be stained or painted to match your garden's colour scheme, adding a personalised touch to your outdoor space.
Installation of diamond trellis panels is simple and can be done with basic tools. They can be mounted onto existing walls or fences using brackets or screws, or installed as freestanding structures with posts. This versatility allows you to create custom layouts and designs that suit your garden's unique character.
Maintaining diamond trellis panels involves periodic cleaning and sealing to protect the wood from the elements. With proper care, these panels will retain their beauty and functionality for years to come, providing a stunning backdrop for your garden's climbing plants.
Fence Topper Trellis
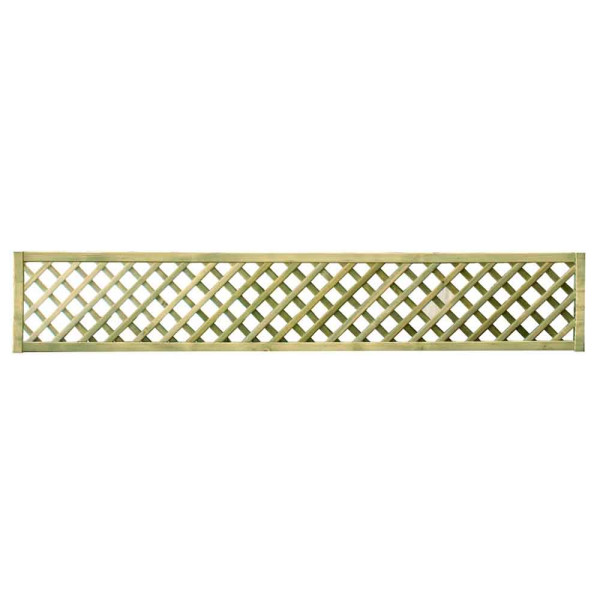
Fence topper trellis panels are an excellent way to add height, privacy, and decorative flair to your existing fence. These panels are designed to sit on top of your fence, extending its height and creating a beautiful finishing touch. They are perfect for supporting climbing plants and adding a touch of elegance to your garden boundaries.
One of the main benefits of fence topper trellis panels is their ability to create a seamless transition between your garden and fence. They add visual interest and soften the appearance of the fence, making it blend more harmoniously with your garden's landscape.
Fence topper trellis panels are available in various styles, including traditional lattice, diamond, and horizontal slatted designs. This variety allows you to choose a panel that complements your garden's overall aesthetic and design theme.
These panels are typically made from wood, offering a natural look that enhances the beauty of your garden. Cedar and pressure-treated pine are popular choices due to their durability and resistance to weather conditions. These panels can be left to weather naturally or painted to match your fence and garden colour scheme.
Installing fence topper trellis panels is straightforward and can be done with basic tools. They can be attached to the top of your fence using brackets or screws, creating a secure and stable extension. This easy installation process makes them a popular choice for DIY garden projects.
Privacy Square Trellis Panels
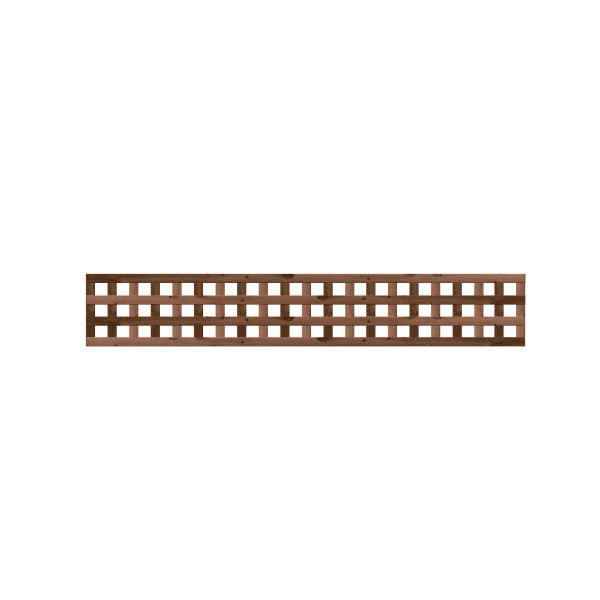
Privacy square trellis panels are the perfect solution for those looking to create a secluded and private outdoor space. Featuring a grid-like pattern with small squares, these panels provide both privacy and support for climbing plants. They are ideal for creating intimate garden areas and screening off unsightly views.
One of the main advantages of privacy square trellis panels is their ability to create a sense of enclosure without completely blocking out light and air. The small squares allow sunlight to filter through while maintaining a level of privacy.
Privacy square trellis panels are typically made from wood, which blends seamlessly with the natural surroundings. Cedar and pressure-treated pine are common materials due to their durability and resistance to rot and decay. These panels can be stained or painted to match your garden's colour scheme, adding a personalised touch to your outdoor space.
Installation of privacy square trellis panels is simple and can be done with basic tools. They can be mounted onto existing walls or fences using brackets or screws, or installed as freestanding structures with posts. This versatility allows you to create custom layouts and designs that suit your garden's unique character.
Maintaining privacy square trellis panels involves periodic cleaning and sealing to protect the wood from the elements. With proper care, these panels will retain their beauty and functionality for years to come, providing a stunning backdrop for your garden's climbing plants.
Fan Trellis Panels
Fan trellis panels are a unique and decorative addition to any garden. Featuring a fan-shaped design with radiating slats, these panels create a visually striking focal point. They are perfect for supporting climbing plants and adding a touch of elegance to your outdoor space.
One of the main benefits of fan trellis panels is their ability to create a sense of movement and flow in the garden. The fan shape draws the eye upward and adds visual interest, making these panels a standout feature in any garden setting.
Fan trellis panels are typically made from wood, which blends seamlessly with the natural surroundings. Cedar and pressure-treated pine are common materials due to their durability and resistance to rot and decay. These panels can be stained or painted to match your garden's colour scheme, adding a personalised touch to your outdoor space.
Installation of fan trellis panels is straightforward and can be done with basic tools. They can be mounted onto existing walls or fences using brackets or screws, or installed as freestanding structures with posts. This flexibility allows you to create custom layouts and designs that suit your garden's unique character.
Maintaining fan trellis panels involves periodic cleaning and sealing to protect the wood from the elements. With proper care, these panels will retain their beauty and functionality for years to come, providing a stunning backdrop for your garden's climbing plants.
Trellis Panels Delivered
We're proud to offer delivery services to a wide range of locations, ensuring you can enjoy our high-quality trellis panels no matter where you are. Our delivery service covers Bedfordshire, Berkshire, Buckinghamshire, Cambridgeshire, East Sussex, Essex, Greater London, Hertfordshire, Kent, Norfolk, Northamptonshire, Oxfordshire, Suffolk, Surrey, and West Sussex.
With our reliable delivery service, you can rest assured that your trellis panels will arrive safely and promptly. We take great care in packaging and transporting our products to ensure they reach you in perfect condition.
Ordering trellis panels from us is easy and convenient. Simply browse our selection online, choose the panels that best suit your needs, and place your order. Our friendly and knowledgeable customer service team is always available to assist you with any questions or concerns you may have.
Once your order is placed, we'll keep you updated on the status of your delivery. You can track your order online and receive notifications when your panels are on their way. This transparency ensures you know exactly when to expect your delivery.
Whether you're located in the heart of Greater London or the serene countryside of Suffolk, our delivery service makes it easy to enhance your garden with our pressure treated quality trellis.
Pressure Treated Wooden Trellis
Gardens are personal sanctuaries. They are spaces where nature and architecture blend harmoniously.
One key element in creating this harmony is garden trellis. Specifically, wooden trellis panels.
Wooden trellis panels are versatile. They can support climbing plants, add visual interest, and enhance privacy.
But not all trellis panels are created equal.
Pressure treated wooden trellis panels stand out. They offer long-lasting durability against rot and insect damage.
This makes them a smart investment for homeowners.
At East Coast Fencing, we offer a variety of these panels. Styles include Horizontal Slatted Trellis, Fence Topper Trellis, Traditional Trellis, Diamond Trellis, Privacy Square Trellis, and Fan Trellis.
Each style has its unique appeal and function.
For instance, Horizontal Slatted Trellis provides a contemporary look. It allows light and air to pass through.
Fence Topper Trellis, on the other hand, can add height and privacy to existing garden fences.
Then there's the Diamond Trellis. It features an attractive crisscross pattern that's ideal for climbing plants.
Our high Trustpilot rating reflects customer satisfaction with our product quality and service.
In this guide, we'll delve deeper into the world of pressure treated wooden trellis panels. We'll explore their benefits, the different styles available, and how to choose the right one for your garden.
Let's transform your garden together.
The Importance of Quality in Garden Trellis
Quality is paramount when selecting garden trellis. It impacts both aesthetics and longevity. High-quality fences enhance the appearance and security of any outdoor space.
Cheap trellis might tempt you with low prices. However, it often lacks durability. Poor quality materials can succumb quickly to weather, wear, and pests.
Investing in quality trellis, like pressure treated wooden trellis panels, pays off in the long run. These panels resist rot and insect damage, ensuring a longer lifespan.
Garden trellis serves multiple purposes. It acts as a barrier, defines boundaries, and creates visual appeal. Durable trellis adds a sense of completion to any garden.
Moreover, a strong trellis can enhance property value. It improves the curb appeal which is vital for prospective buyers. Quality trellis is an investment that reaps returns.
Benefits of Quality Garden Trellis
- Durability: Pressure treated panels withstand harsh weather conditions.
- Aesthetic Appeal: Quality trellis enhances garden beauty with stylish designs.
- Security: Sturdy fences protect your property from unwanted visitors.
- Longevity: High-quality materials mean less frequent replacements.
- Value Addition: A well-fenced garden increases property worth.
Good trellis can also support plants, especially climbing varieties. It creates a perfect backdrop for showcasing blooms. This enhances the garden's overall charm.
Selecting a reliable supplier like East Coast Fencing ensures access to premium products. Their wide range of styles caters to various garden designs, meeting both aesthetic and functional needs.
Customers who opt for superior trellis solutions often express high satisfaction. This choice is reflected in positive testimonials and reviews, reinforcing the importance of quality.
Finally, quality garden trellis integrates well with landscaping efforts. It complements other features like patios, decks, and seating areas. The end result is a cohesive and attractive outdoor environment.
With these advantages in mind, choosing quality trellis, such as pressure treated wooden trellis panels, becomes a sensible decision for any homeowner.
Understanding Pressure Treated Wooden Trellis Panels
Pressure treated wooden trellis panels are a staple in many gardens. Their durability and aesthetic appeal make them popular. Understanding these panels helps homeowners make informed decisions for their outdoor spaces.
These panels are made from timber that has undergone a special preservation process. This process improves the wood's resistance to rot and pests. Therefore, the panels last longer than untreated options.
A key feature of wooden trellis panels is their versatility. They support climbing plants, add structure to gardens, and enhance privacy. With various styles available, they suit different design preferences.
East Coast Fencing provides a wide selection of trellis panels. They offer options like Horizontal Slatted, Traditional, and Diamond Trellis. Each style brings unique benefits to garden settings.
Advantages of Pressure Treated Wooden Trellis Panels
- Long-lasting: Treated wood withstands adverse weather and insect damage.
- Low maintenance: Requires less upkeep compared to untreated wood.
- Versatile: Perfect for supporting climbing plants and garden decor.
- Variety: Available in numerous styles to suit different tastes.
- Eco-friendly: Uses sustainable timber sources for reduced environmental impact.
Trellis panels also serve practical purposes. They can act as garden dividers or screens, offering privacy where needed. Positioned strategically, they can create cozy outdoor spaces or hide unsightly areas.
Ease of customisation is another benefit. Homeowners can cut and shape the trellis to fit specific dimensions or design ideas. This flexibility ensures a perfect fit for any garden layout.
East Coast Fencing stands out with its quality offerings and customer service. Their expertise in fencing solutions guides homeowners in choosing the right products. Transparent product descriptions and support further aid decision-making.
In summary, understanding pressure treated wooden trellis panels reveals their various benefits. Homeowners can transform outdoor spaces with these stylish and durable additions.
What Does Pressure Treating Mean?
Pressure treating is a method of enhancing wood's durability. It's a technique used widely in the fencing industry. The process involves impregnating wood with preservatives under high pressure.
This treatment protects the wood against decay and termites. It ensures the longevity of garden structures, like trellis panels. In essence, the wood becomes more resilient to external factors.
During pressure treatment, chemicals penetrate deeply into the wood fibers. This deep penetration provides comprehensive protection. It reduces the chances of rot and insect infestation dramatically.
The process begins with placing the wood in a treatment chamber. A vacuum removes air from the wood pores. Preservatives are then forced into these pores under high pressure.
After treatment, the wood is left to cure. This curing period allows chemicals to fix within the wood. It results in a stable, durable material that's ideal for garden use.
Pressure treating not only extends the life of the wood but also minimises maintenance needs. Treated wood requires less frequent application of sealants or stains. It saves both time and money for homeowners.
The Benefits of Pressure Treated Wood for Trellis
Pressure treated wood offers several benefits for trellis panels. It's primarily known for its resilience and longevity. These properties make it an excellent choice for outdoor structures.
Homeowners appreciate the low maintenance aspect of treated wood. Unlike untreated counterparts, it remains robust with minimal care. This feature is particularly beneficial for those with busy lifestyles.
Treated trellis panels also have environmental advantages. East Coast Fencing uses timber from sustainable sources. This commitment supports eco-friendly practices in garden planning.
Key Benefits of Pressure Treated Wood
- Durability: Resistant to weather, pests, and decay.
- Cost-effective: Long lifespan reduces replacement costs over time.
- Ease of use: Simplified maintenance needs compared to untreated wood.
- Versatility: Suits various garden designs and functions.
- Eco-friendly: Sourced from sustainable forestry practices.
Pressure treated trellis panels add character and beauty to gardens. Their natural wood finish blends harmoniously with outdoor settings. Yet, they can also be painted to match specific colour schemes, enhancing customisation.
Furthermore, these panels support climbing plants effectively. Their structure provides the perfect framework for vines and flowers. This function enriches the garden's biodiversity and visual appeal.
In conclusion, pressure treated wood is an intelligent choice for trellis panels. It offers homeowners quality, longevity, and peace of mind, making it a valuable garden investment.
Different Styles of Wooden Trellis Panels
Wooden trellis panels come in an array of styles, each offering unique benefits. They contribute to a garden's aesthetics and functionality. With many designs available, homeowners can find options that align with their vision.
Horizontal Slatted Trellis: Modern and Stylish
Horizontal Slatted Trellis panels are perfect for contemporary garden designs. Their clean lines and minimalist appearance add a modern touch. These panels allow light and air to pass, maintaining an open feel.
Ideal for gardens seeking both style and privacy, the horizontal slats create an elegant barrier. They provide support for climbing plants, adding vertical interest. East Coast Fencing offers these in various sizes to suit different needs.
These panels blend seamlessly with modern outdoor furniture and decor. The sleek design complements gardens aiming for a sophisticated appearance. Their versatility allows for creative placements, from standalone structures to fence extensions.
Overall, Horizontal Slatted Trellis panels deliver a trendy yet functional solution. They enhance garden aesthetics while supporting nature's beauty. Homeowners appreciate their balance of form and utility.
Fence Topper Trellis: Enhancing Privacy and Appeal
Fence Topper Trellis panels are an excellent addition to existing fences. They add height and privacy without sacrificing visual appeal. These panels are perfect for creating secluded garden areas.
The design allows for personal space in urban environments. With climbing plants, they transform into living green walls. This feature softens the appearance of traditional fences.
Homeowners often choose Fence Topper Trellis for added security. The extra height creates a more formidable barrier against intrusions. It's a practical yet aesthetically pleasing choice.
In summary, these panels are multifunctional garden enhancements. They offer privacy, security, and a base for climbing plants. Their sleek integration with existing fences makes them a popular choice.
Traditional Trellis: Timeless Elegance
Traditional Trellis panels provide classic charm and sophistication. Their design suits a wide range of garden styles, from rustic to formal. These panels offer simplicity blended with function.
Their structure supports a variety of climbing plants, from roses to ivy. This versatility enriches garden environments, attracting butterflies and birds. Traditional Trellis panels serve both aesthetic and ecological purposes.
The timeless elegance of these panels complements natural surroundings. When paired with classic outdoor furniture, they create a harmonious garden retreat. Their understated beauty enhances any landscape.
Choosing Traditional Trellis panels means opting for grace and durability. They remain a favourite for those seeking enduring garden elegance. Homeowners appreciate their reliability and timeless appeal.
Diamond Trellis: A Climber's Paradise
Diamond Trellis panels feature an intricate crisscross pattern. This design is particularly popular among climbing plant enthusiasts. The structured latticework provides excellent support for plant growth.
These panels create captivating garden walls adorned with floral displays. Climbing roses, clematis, and honeysuckle thrive on Diamond Trellis. The pattern adds visual depth and complexity to gardens.
The unique design draws the eye and adds character to spaces. It's a favourite among gardeners seeking to showcase their horticultural achievements. Diamond Trellis panels are both functional and decorative.
For those who love lush, vibrant gardens, these panels are perfect. They support biodiversity and create stunning vertical gardens. East Coast Fencing offers Diamond Trellis in various sizes to fit garden dimensions.
Privacy Square Trellis: Seclusion with Style
Privacy Square Trellis panels are ideal for creating private garden spaces. Their dense design ensures seclusion without compromising on style. These panels are perfect for intimate outdoor settings.
While providing privacy, they remain visually appealing. The neat, symmetrical layout complements both modern and traditional gardens. Privacy Square Trellis is an excellent choice for urban and suburban environments.
Beyond privacy, these panels support an array of climbing plants. They integrate greenery into boundary structures, softening hard lines. This feature increases garden tranquility and comfort.
In essence, Privacy Square Trellis combines practicality with aesthetics. These panels are an investment in serene, beautiful garden spaces. Homeowners value their ability to create personal retreats.
Fan Trellis: Perfect for Small Spaces
Fan Trellis panels offer a compact solution for limited garden areas. Their fan-like shape is ideal for corners and narrow spaces. Despite their size, they provide ample support for climbing plants.
These panels are perfect for creating focal points with vertical interest. Positioned against walls or fences, they draw attention upward. Fan Trellis is a clever way to maximize small garden spaces.
Their artistic design enhances both traditional and contemporary settings. Coupled with fragrant climbers, they turn constrained spaces into aromatic escapes. Fan Trellis is a fusion of form and function.
Homeowners with limited garden space find these panels invaluable. They can transform modest areas into lush, inviting spots. East Coast Fencing's range of Fan Trellis panels allows for personalised garden design.
Selecting the Right Trellis for Your Climbing Plants
Choosing the right trellis for your climbing plants involves careful consideration. Different plants have unique growth habits and support needs. Matching your trellis to these requirements ensures healthy plant development.
Begin by assessing your garden's conditions. Consider factors like sunlight, moisture, and wind exposure. These elements influence which plants will thrive and what type of trellis will work best.
Each trellis style offers distinct benefits and accommodates specific plant types. Some climbers, like clematis, prefer open structures, while others, like ivy, can cover dense screens. It's essential to understand the growth patterns of your chosen plants.
When selecting a trellis, think about the plant's mature size. Small trellises may not support large climbers like wisteria. Conversely, delicate climbers like sweet peas need finer lattices to encourage upward growth.
Consider these steps when choosing your trellis:
- Identify plant type: Know your plant's specific support needs.
- Assess garden conditions: Determine the light and moisture levels.
- Match trellis style: Choose a design that fits the plant's growth habit.
- Plan for maturity: Select a trellis that accommodates the plant at full size.
- Consider aesthetics: Ensure the trellis complements your garden theme.
The trellis should align with your garden's overall design and functionality. Traditional Trellis suits classic gardens, while Horizontal Slatted fits modern settings. The right trellis enhances both the plant and the space's aesthetic.
Finally, factor in your garden goals. Are you aiming for privacy, support, or visual interest? Each goal requires a different trellis type. Thoughtful selection ensures your garden's success.
By understanding your plants and your garden's conditions, you can select the ideal trellis. East Coast Fencing offers diverse options to suit various needs. This ensures your garden reaches its fullest potential, both in beauty and function.
Installation and Care for Longevity
Proper installation and regular care are vital for extending the life of your wooden trellis panels. By following these tips, you ensure that your investment continues to enhance your garden for years.
A correctly installed trellis provides sturdy support for climbing plants. This stability is crucial, especially in areas prone to high winds or harsh weather. Ensure your trellis is securely anchored to withstand environmental challenges.
Routine maintenance plays a significant role in the longevity of garden structures. Wood, although durable, requires periodic attention to maintain its integrity. With simple, regular checks, your trellis can remain a striking garden feature.
Prolong your trellis' lifespan with these essential care tips:
- Inspect regularly: Check for signs of rot or insect damage.
- Clean seasonally: Remove dirt and debris to prevent decay.
- Treat wood: Apply a wood preservative every few years.
Proper care not only maintains appearance but also ensures continued support for your plants. A well-maintained trellis is a foundation for healthy plant growth.
Avoid common installation and care pitfalls by seeking professional guidance when needed. Professional installation services can ensure optimal placement and support for your trellis panels. If in doubt, consult experts like East Coast Fencing.
How to Install Your Wooden Trellis Panels
Begin trellis installation by assessing your garden layout. Determine the ideal location based on sun exposure and garden design. This step ensures plants receive adequate light and space to thrive.
Next, gather the necessary tools and materials. Basic items include a level, drill, screws, and post anchors. Preparing ahead saves time and minimises disruptions during the installation process.
Position your trellis level and secure. Use a spirit level to ensure alignment. Once aligned, attach using screws or brackets for stability.
For ground installation, dig holes for the trellis posts, ensuring they're deep enough to support the structure firmly. Fill holes with concrete or compacted soil for added strength. Once secure, check all connections for stability.
If attaching to an existing fence or wall, use brackets for support. This method requires ensuring the wall can handle the added weight and pressure from climbing plants. Proper anchoring prevents future adjustments.
Maintaining Your Trellis for Years to Come
Begin maintenance by performing a visual inspection. Look for signs of wear, like cracks or rot. Address these issues immediately to prevent further damage.
Cleaning your trellis helps prevent decay. Use a gentle brush and soapy water to remove debris. Rinse thoroughly and allow to dry to discourage mold and mildew.
Regularly apply a wood preservative. This prolongs life and enhances resistance to elements. Choose products specifically for pressure-treated wood, ensuring compatibility.
Monitor plant growth around your trellis. Trim heavy vines or branches that may strain its structure. A balanced plant load reduces stress on wood, preventing deformation.
Protecting the structural integrity of your trellis extends its functionality and visual appeal. Consistent care enables you to enjoy a lush, vibrant garden supported by a robust trellis network. Through careful maintenance, you preserve your wooden trellis, securing its role in your garden's beauty and support system.
Why Choose East Coast Fencing for Your Trellis Needs
Selecting the right supplier for your garden fencing is crucial. East Coast Fencing stands as a premier choice for those seeking high-quality trellis panels.
Our offerings span a variety of styles, ensuring you find the perfect match for your garden. Whether you need modern or traditional designs, we've got you covered. Each trellis style brings unique visual and functional benefits to your outdoor space.
Customer satisfaction is at the core of our service. We prioritize providing detailed product information and guidance. This support enables you to make well-informed decisions tailored to your garden's needs.
Our commitment to quality ensures each trellis panel withstands time and environmental challenges. Pressure-treated wood provides durability, enhancing both security and appeal in your garden.
East Coast Fencing offers an easy online shopping experience. Browse our extensive catalog with convenience from the comfort of your home. Our user-friendly platform ensures finding the right products is simple and efficient.
Delivery efficiency is essential for customer satisfaction. We deliver across various counties, ensuring you receive your trellis panels promptly. Our strategic distribution network supports timely and reliable service.
By choosing East Coast Fencing, you support a business dedicated to excellence in product and customer service. Our commitment extends beyond just sales, ensuring that your garden thrives with our fencing solutions.
Reasons to choose us include:
- Extensive range of high-quality trellis styles
- Pressure-treated wood for long-lasting durability
- User-friendly online ordering system
- Reliable delivery service across multiple counties
Our Commitment to Quality and Customer Satisfaction
At East Coast Fencing, quality is a non-negotiable standard. Every trellis panel is crafted with precision to meet our rigorous standards.
Pressure-treated wood is selected for its superior resilience. This choice provides a robust foundation for your garden's beauty and security.
We offer detailed product descriptions and expert advice. Our team is dedicated to ensuring you receive comprehensive information, aiding in your decision-making process.
Our commitment extends to offering post-purchase support. We ensure your experience with our products is seamless from selection to installation.
Customer satisfaction is reflected in our exceptional service ratings. Our dedication to meeting and exceeding customer expectations sets us apart.
East Coast Fencing continually invests in improving our offerings and services. This commitment ensures your garden maintains its aesthetic and functional excellence.
The East Coast Fencing Difference: Over 10,000 5-Star Reviews
Reputation speaks volumes about a company's reliability. East Coast Fencing boasts over 10,000 5-star reviews on Trustpilot.
Each review highlights our dedication to delivering top-tier products. Customers consistently praise the quality and durability of our trellis panels.
Our customer service is frequently commended. We strive to resolve queries swiftly and effectively, ensuring a smooth experience.
We welcome feedback to enhance our offerings continuously. This proactive approach helps us adapt and improve our services.
Reading through our reviews provides insight into our customer-focused approach. These testimonials are a testament to our commitment to quality.
Our customers value both the aesthetic and structural benefits our products offer. By choosing East Coast Fencing, you're investing in proven excellence.
Join the community of satisfied customers who trust us for their fencing needs. Experience firsthand the difference that our commitment to quality and customer service makes.
Enhancing Your Garden's Aesthetic with Trellis Panels
Garden design is a delicate balance of functionality and beauty. Incorporating trellis panels can transform any outdoor space into an elegant landscape. These panels offer more than just support for plants; they add structure and definition to your garden layout.
Pressure treated wooden trellis panels come in various styles that suit diverse aesthetic preferences. Whether you prefer sleek contemporary lines or classic charm, there is a design to enhance your garden's appeal. The natural wood finish also complements any garden theme, offering a seamless integration with other elements.
Trellis panels are versatile features that can create distinct visual interest in your garden. Use them as backdrops for seating areas or focal points near flower beds. Their ability to support climbing plants adds vertical dimension, making gardens appear more dynamic and layered.
Creating privacy and seclusion in open spaces can be challenging. Trellis panels are an excellent solution, offering a subtle way to screen areas without compromising on style. Privacy Square Trellis, for instance, delivers both functionality and aesthetic grace.
Light and shadow play are essential in garden design. The open structure of many trellis styles allows dappled sunlight to filter through, creating enchanting shadow patterns. This interplay of light adds a magical quality to your garden, changing with the time of day.
For those looking to make a bold statement, Fan Trellis panels can accentuate smaller spaces with their unique design. When adorned with vibrant climbing plants, they become living art pieces within your garden.
Incorporating trellis panels also provides practical benefits beyond aesthetics. They define pathways, create partitioned zones, and support eco-friendly gardening. By encouraging plant growth vertically, trellis panels maximise space and contribute to a sustainable garden ecosystem.
Consider these ways to enhance your garden's aesthetic with trellis panels:
- Use as decorative dividers for pathways or seating areas
- Create privacy screens without obstructing views
- Accentuate garden entrances with Diamond Trellis designs
- Support vibrant climbing plants for vertical gardening
- Define outdoor areas with structured lines and natural beauty
Ultimately, pressure treated wooden trellis panels blend functionality with visual charm. They invite creativity in garden design, offering endless possibilities to enhance and personalise your outdoor space. With careful selection and placement, these panels become integral parts of a garden's allure and elegance.
Creative Ways to Use Trellis Panels in Your Garden
Trellis panels are not only supportive structures for plants but versatile tools for creative garden design. Their adaptability allows homeowners to explore new and exciting layout possibilities. From adding height to creating secluded corners, the potential is vast.
One innovative use of trellis panels is to create living walls. By positioning trellis panels against fences or garden walls, you can grow climbing plants vertically. This technique not only maximises space but also creates a lush, green backdrop in your garden.
Think about utilising trellis panels to form garden partitions. This can delineate dining areas from play zones or vegetable gardens. Such partitions guide the flow of your garden, offering both structure and visual intrigue.
Trellis panels are excellent for designing garden arches. Install panels to form an arch over pathways or entryways. Adorn them with fragrant climbing roses or honeysuckle for a whimsical, inviting entrance.
Consider framing views with carefully placed trellis panels. They can guide the eye to a distant focal point like a water feature, a statue, or a beloved tree. This technique uses the trellis as a window to highlight key garden features.
In small garden spaces, trellis panels can optimise plant growth without encroaching on floor area. Install them along boundary lines, encouraging climbers to grow upwards and save horizontal space.
Climbing plants in urban gardens benefit significantly from trellis panels. They offer these plants a foothold to flourish amidst concrete landscapes. Thus, these panels become a green sanctuary in urban settings.
Expand your creativity with trellis use through the following ideas:
- Create a fragrant, living wall with jasmine or clematis
- Use panels to form decorative ceilings or canopies
- Design themed zones by using panels as natural dividers
- Showcase seasonal blooms with removable panels
- Innovate with vertical herb gardens for culinary use
By thinking outside traditional uses, trellis panels can redefine garden spaces. They inspire creative expressions that reflect personal style and elevate outdoor environments. Whether it's a classic layout or a modern twist, these panels are canvases for your garden art.
Frequently Asked Questions About Wooden Trellis Panels
Wooden trellis panels are popular for enhancing garden aesthetics and function. Here, we address some common questions to assist you in making informed decisions.
What are pressure treated wooden trellis panels?
Pressure treated panels are wood infused with preservatives. This process guards against rot and insect damage, prolonging their lifespan in outdoor environments.
How do I choose the right trellis for my plants?
Consider the plant's growth habits. For heavy climbers like wisteria, opt for sturdier panels. Lighter panels suit delicate climbers such as sweet peas or clematis.
Can trellis panels be painted or stained?
Yes, they can be customised with paint or stain to match your garden theme. It's advisable to use products suitable for wood to maintain protection.
What sizes do trellis panels come in?
Trellis panels are available in various sizes to fit different spaces. Standard sizes often range from small fan trellises to larger square panels.
How should I maintain my wooden trellis panels?
Regular checks for damage and prompt repairs are vital. Clean the panels annually and reapply wood sealant to ensure durability over time.
Are trellis panels easy to install?
Installation can be simple with basic tools. For larger projects, consider professional installation to ensure stability and a perfect fit.
Quick Reference: Trellis FAQ
- Pressure Treatment: Infuses preservatives for durability.
- Plant Suitability: Match panel strength to plant weight.
- Customisation: Compatible with paint or stain.
- Size Variability: Available in multiple dimensions.
- Maintenance Tip: Clean and seal annually.
- Installation Ease: DIY or professional options available.
Understanding these aspects of wooden trellis panels can help you enhance your garden with confidence. Make the most of these features for a beautiful, functional outdoor space.
Transform Your Garden with East Coast Fencing Trellis Panels
Incorporating pressure treated wooden trellis panels into your garden transforms your outdoor space into a haven of beauty and function. These trellis panels not only support climbing plants but also enhance privacy and provide stylish garden dividers.
East Coast Fencing offers a broad selection of trellis styles to accommodate any garden design. From modern horizontal slatted options to timeless traditional designs, there's something to suit every aesthetic preference. Our commitment to quality ensures you're investing in durable, high-performance products.
By choosing East Coast Fencing, you're selecting a trusted supplier with a reputation for excellence. Our high Trustpilot ratings reflect our dedication to customer satisfaction. Your garden project is in capable hands with our expert guidance and superior products.
Transform your garden today with East Coast Fencing's range of trellis panels. Experience the perfect blend of form and function and elevate your property's curb appeal. Discover how our trellis panels can make your garden the envy of the neighbourhood.
Take the Next Step with East Coast Fencing
Ready to enhance your garden's beauty and functionality? Explore the extensive selection of pressure treated wooden trellis panels at East Coast Fencing. Whether you're looking to add privacy or aesthetic appeal, our diverse range caters to every need.
Visit our website today to browse our offerings and find the perfect trellis for your garden. With our user-friendly online platform and excellent customer service, transforming your outdoor space has never been easier. Trust in East Coast Fencing to deliver quality, reliability, and satisfaction with every purchase.


