





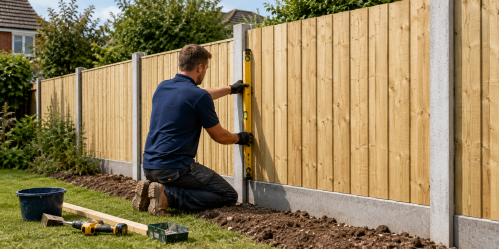
Quick answer: Start by confirming the boundary, finished fence height and location of buried services. Choose a complete compatible system of panels, posts, gravel boards, foundations and fixings. Mark the fence with a string line, set the first post accurately, then work along the boundary one measured bay at a time. Keep every post upright in both directions, allow foundations to become stable before loading them, and use at least one helper for large panels, concrete products and garden gates.
Installing a garden fence is a realistic project for an experienced DIYer, but it should not be approached as a simple row of panels. The posts, foundations, gravel boards, fixings and gate supports determine whether the completed fence remains straight and secure.
The installation method depends on the system. Framed fence panels fixed between wooden posts require different setting out and fixings from panels lowered into slotted concrete posts. Traditional closeboard fencing built from feather edge boards and cant rails requires another method again.
The ground also affects the work. Clay, loose soil, tree roots, old concrete foundations, slopes and buried services can turn a straightforward fence run into a more demanding construction project.
This guide covers the complete process, including choosing panels, calculating quantities, setting timber and concrete posts, fitting gravel boards, installing gates, handling sloping ground, building traditional closeboard fencing and checking the finished structure.
Can You Install A Garden Fence Yourself?
You can install a garden fence yourself when the project matches your tools, experience and physical ability.
A relatively manageable DIY project normally has:
- A clearly agreed boundary
- Good access to the working area
- A short or moderate fence run
- Reasonably level ground
- Standard framed fence panels
- No major retaining work
- No unresolved underground-service concerns
- At least one suitable helper
The work becomes more difficult where:
- Concrete posts and gravel boards are used
- Old foundations must be removed
- The fence is tall and exposed to wind
- The boundary has a steep slope
- Large roots cross the fence line
- A heavy garden gate is included
- The posts must be installed through paving
- The boundary position is disputed
Replacing a compatible panel between sound existing posts is usually much easier than installing an entirely new fence.
Which Fence Installation Method Are You Using?
| Fence System | Main Components | Typical Installation Method | DIY Difficulty |
|---|---|---|---|
| Framed panels with timber posts | Panels, wooden posts, gravel boards, clips or screws | Panels fixed between posts | Moderate |
| Framed panels with concrete posts | Panels, slotted posts, concrete or wooden gravel boards | Boards and panels lowered into slots | High |
| Traditional closeboard fencing | Posts, cant rails, feather edge boards and gravel boards | Fence assembled board by board | High |
| Picket fencing | Picket panels or pales, rails and wooden posts | Low panels fixed to timber supports | Moderate |
| Trellis screen | Trellis, battens and timber posts | Framed trellis fixed to independent supports | Moderate |
| Garden gate | Gate, substantial posts, hinges, latch and bolt | Gate hung and aligned after posts are stable | High |
Choose the system before measuring post positions. The post width, panel fixing method and gravel-board arrangement affect the distance occupied by every bay.
What Fence Panel Should You Install?
Closeboard Fence Panels
Closeboard panels use overlapping vertical feather edge boards within a framed panel. They provide solid privacy and suit rear boundaries, side passages and secure garden enclosures.
Standard closeboard panels are available in several heights, while ultra heavy duty closeboard panels provide a more substantial framed option.
These panels catch considerable wind because they are solid. Use posts and foundations appropriate to the height and site exposure.
Waney Lap Fence Panels
Waney lap panels use overlapping horizontal boards. They provide traditional solid screening and can be a practical option for an economical boundary replacement.
They may be lighter than substantial closeboard panels, but they still need secure fixings and sound posts.
Picket Fence Panels
Picket panels create low open boundaries. Round-top and point-top designs suit front gardens, paths and internal garden divisions.
Lower panel height and open construction normally reduce wind loading, making picket fencing one of the more approachable DIY systems.
Horizontal Hit And Miss Panels
Hit and miss panels place horizontal boards on alternating sides of the frame. They provide partial screening and allow more airflow than solid closeboard or lap fencing.
The panels can be substantial, so plan the lifting and post strength carefully.
Omega Lattice Panels
Omega lattice panels combine a solid lower section with a curved decorative lattice top. They provide useful lower-level screening while admitting light through the upper section.
The lattice is more vulnerable to handling damage than broad fence boards. Lift the panel from its main frame rather than the decorative top.
Double Slatted Fence Panels
Double slatted panels provide contemporary horizontal screening with intentional openings for light and airflow.
Avoid lifting or clamping the panel by individual slats. Support the external frame during transport and installation.
Which Panel Height Should You Use?
Available framed-panel heights include a range of nominal 3ft, 4ft, 5ft, 5ft 6in and 6ft options, depending on the panel style.
Choose the height according to:
- The required privacy
- The difference in ground levels
- The fence location
- Wind exposure
- The gravel-board height
- Any trellis or topper
- Planning or estate restrictions
The panel height is not necessarily the final boundary height. A 6in or 12in gravel board raises the panel, and trellis raises the highest point further.
Should You Use Timber Or Concrete Posts?
Timber Fence Posts
Wooden posts are lighter, easier to drill and easier to adapt on site. They provide a consistent timber appearance and work well with framed panels, picket fencing, trellis and traditional closeboard construction.
The available wooden post sections include:
- 75 x 75mm
- 100 x 100mm
Available lengths include:
- 1.8m
- 2.4m
- 3.0m
Brown and green pressure-treated finishes are available.
A 75 x 75mm post may suit lower or lighter fencing in sheltered locations. A 100 x 100mm post provides a more substantial starting point for taller, heavier or more exposed fencing.
Concrete Fence Posts
Concrete posts do not rot and work naturally with compatible framed panels and gravel boards.
The available configurations include:
- Intermediate posts for straight runs
- End posts
- Corner posts
- Three-way posts
Available lengths run from approximately 1.5m to 2.7m.
Concrete products are heavy and should be installed with enough help or suitable handling equipment.
Do You Need Gravel Boards?
Gravel boards are strongly recommended where timber panels would otherwise sit close to soil, grass, mulch or wet debris.
They help:
- Protect the lower panel frame
- Reduce rain splash
- Reduce strimmer and lawnmower damage
- Create a defined base line
- Close gaps beneath the fence
- Make later panel replacement easier
Wooden Gravel Boards
Pressure-treated wooden gravel boards are available in lengths of approximately 1.83m, 2.4m and 3.0m, with brown and green finishes.
They are lighter than concrete and can be shortened for custom bays.
Concrete Gravel Boards
The concrete range includes:
- 6in smooth boards
- 12in smooth boards
- 12in recessed boards
- 6in lightweight rebated boards
- 12in lightweight rebated boards
- 12in smooth boards with a hedgehog opening
Concrete boards resist rot but remain heavy. They should not normally be cut as an ordinary site adjustment.
Neither wooden nor concrete gravel boards should be treated as retaining walls for a significant bank of soil.
How Do You Calculate The Finished Fence Height?
Add together every visible component:
- Gravel board
- Fence panel
- Trellis or topper
- Any deliberate clearance or packing
Nominal examples include:
- A 5ft 6in panel above a 6in gravel board creates a section close to 6ft
- A 5ft panel above a 12in gravel board creates a section close to 6ft
- A 6ft panel above a 6in gravel board creates a section close to 6ft 6in
Actual dimensions and ground levels affect the final result. Measure the products before setting posts permanently.
How Many Panels And Posts Do You Need?
For an existing fence, count and measure every post bay.
For a new straight run:
- Measure the total boundary length.
- Confirm the actual panel width.
- Add the width occupied by every post.
- Deduct gate openings.
- Mark corners and changes in direction.
- Calculate the number of complete panel bays.
- Plan one shortened end bay where required.
A straight run of six panels normally needs seven posts. Corners, gates and junctions change the number and type of posts.
Do not calculate the run by dividing the boundary length only by 1.83m. The posts occupy additional space.
Where Should A Shortened Panel Be Positioned?
Place a shortened panel at the least prominent end of the run where possible.
A narrow panel in the middle of a decorative fence interrupts the pattern and can look accidental.
When planning a cut panel:
- Check that the design can be altered safely
- Allow for a replacement side frame
- Keep every board or slat supported
- Protect fresh timber cuts
Omega lattice and double slatted panels are harder to shorten neatly than simple closeboard or lap panels.
What Should You Check Before Starting?
Confirm The Boundary
Establish where the fence will sit before removing the existing structure.
Do not rely only on:
- The current fence position
- The side on which posts are visible
- An assumed left-side or right-side rule
- A hedge line
- An enlarged title plan used as a precise site survey
Where the position is uncertain, review the available property documents and discuss the proposed line with the adjoining owner.
Do not remove a neighbour's fence or attach a new fence to their property without agreement.
Check The Finished Height
In England, planning permission is generally not required where a fence, wall or gate does not exceed:
- 1m beside a highway used by vehicles or the footpath of that highway
- 2m in many other locations
Additional restrictions can apply to listed buildings, properties within their curtilage, planning conditions, managed estates and sites where permitted development rights have been restricted.
Planning systems differ elsewhere in the United Kingdom.
Check For Underground Services
Fence-post excavation can encounter:
- Electricity cables
- Gas pipes
- Water supplies
- Drainage pipes
- Outdoor-lighting cables
- Pond or pump supplies
- Garden-building services
- Irrigation systems
Plan the work, gather available service information, use suitable locating methods and excavate cautiously.
Stop if you find an unexplained pipe, cable, duct, warning tape or concrete protection. Do not assume that an unidentified service is redundant.
Check Trees And Roots
Large roots can prevent the post from being placed in the planned position. Avoid cutting significant roots without understanding the effect on the tree.
Protected trees and trees in conservation areas may be subject to additional controls.
What Tools And Safety Equipment Do You Need?
A typical new fence installation requires:
- Tape measure
- String line
- Setting-out pegs
- Marker pencil or chalk
- Long spirit level
- Post-hole digger
- Spade
- Digging bar
- Shovel
- Wheelbarrow
- Drill or impact driver
- Suitable drill and driver bits
- Hand saw or appropriate power saw
- Clamps
- Hammer and rubber mallet
- Temporary timber braces
- Protective gloves
- Safety footwear
- Eye protection
- Hearing and respiratory protection where required
Concrete posts, gravel boards and large panels may need lifting straps, a suitable trolley or additional people.
A concrete breaker may be worth hiring where several old foundations must be removed. A powered auger may help in suitable clear ground, but it should not be used as a shortcut around buried-service checks.
What Materials And Fixings Do You Need?
A framed-panel fence may require:
- Fence panels
- Wooden or concrete posts
- Wooden or concrete gravel boards
- Rapid-set post mix
- Fence-panel clips
- Exterior screws
- Panel security brackets where compatible
- Cut-end treatment
- A gate and gate furniture
Available installation products include:
- 46mm fence-panel clips
- Fence-panel security brackets
- 150mm flush-head screws
- 450mm tee hinges
- 150mm ring latches
- 150mm pad bolts
- Rapid-set post mix
Confirm that every fixing suits the panel frame, timber thickness and outdoor exposure.
How Should Materials Be Delivered And Stored?
Plan the route from the delivery point to the fence line before materials arrive.
Consider:
- Narrow side passages
- Steps
- Soft lawns
- Low branches
- Tight corners
- The weight of concrete products
- Safe temporary storage
Store panels above wet ground on level supports. Support them at several points to reduce distortion.
Do not:
- Lean panels where wind can overturn them
- Place heavy materials on lattice or slats
- Leave wooden posts lying in standing water
- Stack concrete products on unstable ground
- Block emergency or neighbour access
How Do You Remove An Existing Fence?
- Photograph the fence: Record the current line, corners and ground levels.
- Remove attachments: Take down lights, planters, trellis and loose cables.
- Control access: Keep children and pets away from the work.
- Remove panels: Release screws, clips or brackets before lifting.
- Remove gravel boards: Use enough people for concrete products.
- Expose the posts: Remove soil around old foundations.
- Extract the posts and concrete: Remove enough of the old foundation for the replacement installation.
- Collect sharp fixings: Do not leave nails or screws in the soil.
- Separate waste: Keep timber, concrete and metal organised for appropriate disposal.
Do not burn treated fencing timber in a garden fire or domestic stove.
Can Existing Posts Be Reused?
Existing posts may be reused if they are:
- Upright
- Secure in their foundations
- Correctly spaced
- Long enough for the new fence
- Strong enough for the replacement panels
- Free from significant rot, splitting or cracking
Check timber posts particularly carefully at ground level.
Check concrete posts for:
- Structural cracks
- Exposed reinforcement
- Broken slots
- Movement in the foundation
- Incorrect spacing
Do not install a heavier replacement panel into posts that were already leaning or moving.
Can A Timber Post Be Repaired With A Concrete Spur?
A concrete repair spur may reinforce a wooden post that has failed around ground level while remaining sound above.
Repair-spur sizes are available for:
- 75 x 75mm posts
- 100 x 100mm posts
A repair may be suitable where:
- The upper post remains structurally sound
- The fence can be realigned
- The spur can be set into a suitable foundation
- A secure connection can be made
Replace the post where decay extends through a large proportion of the timber.
How Do You Set Out The Fence Line?
Step 1: Mark The Start And End
Place secure pegs beyond the planned start and end positions where possible.
Use separate setting-out points for each change in direction.
Step 2: Run A String Line
Pull the string taut along the intended post face.
Keep the line slightly clear of the posts so they do not push it out of alignment.
Step 3: Mark Gates And Corners
Mark:
- Gate hinge post
- Gate closing post
- End posts
- Corner posts
- Three-way junctions
Step 4: Mark Every Bay
Use the actual panel, post and gravel-board dimensions.
Measure repeatedly from fixed reference points rather than adding one approximate bay after another.
Step 5: Check The Final Bay
Confirm the remaining space before digging. Adjust the planned shortened panel now rather than discovering the problem at the final post.
How Do You Dig Fence Post Holes?
No single post-hole size is correct for every fence. The required excavation depends on:
- Visible fence height
- Post material and section
- Panel weight and solidity
- Soil strength
- Wind exposure
- Gravel-board height
- Gate loads
The excavation should provide enough below-ground support to resist movement without relying on loose surrounding soil.
A practical process is:
- Confirm the marked position.
- Check again for buried services.
- Remove turf and loose surface material.
- Use a spade to form the opening.
- Loosen firm ground cautiously with a digging bar.
- Remove soil using a post-hole digger.
- Keep the sides controlled rather than creating an unnecessarily wide crater.
- Remove loose material from the bottom.
- Check the depth and position before inserting the post.
Stop if the hole fills with water, collapses repeatedly or encounters a substantial obstruction. The foundation method may need reconsidering.
How Do You Set The First Timber Post?
Step 1: Place The Post
Lower the post into the prepared hole without damaging the sides.
Step 2: Check The Visible Height
Account for the panel, gravel board and any planned post projection.
Step 3: Align It With The String
Position the correct post face consistently along the line.
Step 4: Check It In Two Directions
Use a spirit level on adjacent faces. A post can be upright across the boundary while leaning along it.
Step 5: Brace The Post
Use at least two temporary braces arranged in different directions.
Step 6: Add Post Mix
Follow the instructions supplied with the rapid-set post mix. Do not guess the water quantity or working time.
Step 7: Recheck The Alignment
Check the post immediately after filling the hole and while the material begins to firm.
Step 8: Leave The Post Undisturbed
Do not load it with panels or a gate before the foundation is ready.
How Do You Set The Remaining Timber Posts?
There are two main methods.
Set Several Posts From Measured Positions
This allows the foundations to become stable before panels are installed, but the bay measurements must be exact.
Work One Bay At A Time
Set the first post, use the gravel board or an accurate spacing template to position the next post, then continue along the run.
This can reduce accumulated spacing errors, but the new post must not be pushed by the panel or board while the foundation is still weak.
For every post, check:
- Bay width
- Visible height
- Position against the string
- Vertical alignment in two directions
- Brace stability
How Do You Fit Wooden Gravel Boards?
- Measure the clear bay between the posts.
- Cut the board where required.
- Protect fresh cut ends.
- Position the board at the planned height.
- Check it is level or follows the intended step.
- Fix it using suitable exterior screws or brackets.
- Confirm it is supported at both ends.
Do not bury the board more than necessary or trap it against a mound of wet soil.
How Do You Fit A Panel Between Timber Posts?
- Install the gravel board: Confirm that it is level and secure.
- Position temporary blocks: Use equal blocks to hold the panel at the required height.
- Lift the panel: Use a helper and carry it by the main frame.
- Check the side clearances: Do not force the panel into a narrow bay.
- Check the panel level: Confirm both the top and main frame.
- Clamp the panel: Hold it securely without damaging decorative slats or lattice.
- Fit clips or screws: Fix through the substantial frame.
- Use several fixing heights: Tall panels need restraint near the top and bottom as well as through the middle.
- Remove the temporary blocks: Check that the panel remains stable.
The available 46mm panel clips should be compared with the actual panel-frame thickness before installation.
Do not fix only through thin boards, lattice strips or decorative slats.
How Do You Install Concrete Fence Posts?
Concrete posts require greater attention to handling and slot orientation.
Step 1: Select The Correct Post
Confirm whether the position needs an intermediate, end, corner or three-way post.
Step 2: Plan The Lift
Clear the carrying route and prepare the hole, braces and tools before moving the post.
Step 3: Confirm The Slot Direction
Rotate the post correctly before it enters the hole.
Step 4: Lower The Post
Use enough people or suitable handling equipment to maintain control.
Step 5: Set The Visible Height
Allow for the gravel board and panel.
Step 6: Check Both Directions
Use a long level and check the post against the string.
Step 7: Brace Securely
Concrete posts can cause severe injury if they fall. Use stable braces and keep the area clear.
Step 8: Place The Foundation Material
Follow the post-mix instructions and recheck the post before the material firms.
Do not use a panel or gravel board to lever a misaligned concrete post after setting.
How Do You Space Slotted Concrete Posts?
The spacing must accommodate the actual panel or gravel-board length within the opposing slots.
Measure:
- The panel width
- The gravel-board length
- The depth of both post slots
- The amount of practical fitting clearance
The opening must be wide enough for installation but not so wide that the panel can escape from one slot.
Use an accurate rigid spacing guide where practical. Do not rely on a flexible tape measure alone while heavy posts are being positioned.
How Do You Fit Concrete Gravel Boards?
- Allow the post foundations to become sufficiently stable.
- Clear debris from both slots.
- Prepare a controlled lifting route.
- Use enough people to lift the board evenly.
- Keep hands away from the slots and lower edges.
- Lower both ends at the same rate.
- Seat the board fully.
- Check the level and post spacing.
Products described as lightweight remain substantial construction components. Assess the complete handling task rather than whether one person can briefly lift an end.
How Do You Fit Panels Into Concrete Posts?
- Confirm that the gravel board is stable and level.
- Check that both slots are clear.
- Measure the panel thickness against the slot.
- Lift the panel using at least one helper.
- Keep the panel upright.
- Lower both ends evenly into the slots.
- Seat the panel onto the gravel board.
- Check for excessive side movement.
- Fit compatible security brackets where required.
Do not force a thick decorative frame into a narrow slot. This can damage the panel and chip the post.
What Are Fence-Panel Security Brackets?
Security brackets can help reduce the risk of a compatible panel being lifted vertically from slotted concrete posts.
They may also reduce upward movement in exposed conditions.
They cannot correct:
- Posts that are too far apart
- A panel that is too narrow
- A broken gravel board
- A leaning post
- A distorted panel frame
How Do You Build Traditional Closeboard Fencing?
Traditional closeboard fencing is assembled on site using individual feather edge boards fixed to rails between posts.
A typical system uses:
- Wooden or compatible concrete posts
- Cant rails
- Feather edge boards
- Wooden or concrete gravel boards
- Exterior nails or screws
- Capping where compatible
Available feather edge boards have a nominal section of approximately 125 x 22mm and are supplied in several lengths from 0.9m to 2.1m, with selected brown and green pressure-treated options.
Cant rails have a nominal section of approximately 125 x 47mm and are available in 2.4m and 3.0m lengths.
Step 1: Set The Posts
Space the posts for the selected rail lengths and site conditions.
Step 2: Fit The Gravel Board
Set the lower line and keep the boards away from soil.
Step 3: Fit The Cant Rails
Use enough rails for the fence height and fix them securely into the posts or compatible rail connections.
Step 4: Mark The Board Line
Use a string or template to keep the feather edge boards consistent.
Step 5: Install The First Board
Set it upright and establish the intended overlap direction.
Step 6: Maintain A Consistent Overlap
Use a simple spacing gauge rather than estimating every board by eye.
Step 7: Fix Through The Thicker Edge
Use suitable exterior nails or screws. Avoid fastening both overlapping boards together in a way that prevents natural movement.
Step 8: Finish The Top
Install compatible capping where it forms part of the design.
Traditional closeboard fencing is useful on slopes and non-standard boundaries because each board can be positioned individually.
How Do You Shorten A Framed Fence Panel?
- Measure the finished opening at several heights.
- Deduct the required fitting clearance.
- Mark a straight cutting position.
- Install or reposition a vertical side frame.
- Fix every board or slat into the new frame.
- Cut away the excess section.
- Remove sharp edges and loose fixings.
- Apply suitable cut-end protection.
Do not cut through a panel and leave unsupported horizontal boards or slats.
How Do You Install Fencing On A Slope?
Stepped Framed Panels
Rigid panels are normally installed level, with each bay starting higher or lower than the previous one.
Before digging:
- Measure the total change in ground level.
- Divide the run into panel bays.
- Calculate the step at each post.
- Select post lengths for every position.
- Plan the gravel-board steps.
- Check the gaps beneath the lower corners.
A large height change within one panel width can create a substantial triangular opening beneath the panel.
Raked Traditional Closeboard Fencing
Individual feather edge boards can follow the slope more closely than framed panels.
The posts remain vertical, while the rails and board bottoms are planned to suit the ground.
This method requires more cutting and more careful board alignment.
How Do You Deal With Corners?
Plan corners before setting intermediate posts.
With timber posts, confirm:
- Which post faces will receive each panel
- Whether clips or direct fixings have enough timber
- How the gravel boards meet
- Whether a larger post is appropriate
With concrete systems, use a corner post with the correct slot arrangement.
Check the angle before adding foundation material. A small rotational error affects both adjoining runs.
How Do You Finish A Fence At A Wall?
A fence may end at a masonry wall using a suitable wallplate or independent end post.
Available wallplates include nominal 100 x 47mm pressure-treated timber in selected lengths.
Before fixing to masonry:
- Check the wall is structurally sound
- Avoid loose render and damaged mortar
- Choose fixings for the actual wall material
- Consider damp and drainage
- Keep the timber upright and packed correctly
Do not assume a thin garden wall, decorative pillar or single skin of weak masonry can support the full wind load of a tall fence.
Can Drive-In Post Spikes Be Used?
Drive-in supports are available for compatible 75 x 75mm and 100 x 100mm wooden posts.
They may suit:
- Low picket fencing
- Light internal divisions
- Some trellis screens
- Firm and consistent ground
They may be unsuitable for:
- Tall solid panels
- Heavy garden gates
- Loose or waterlogged soil
- Rubble-filled ground
- Highly exposed sites
Check for buried services before driving any spike into the ground.
Can Bolt-Down Post Supports Be Used?
Bolt-down supports are available for compatible 75 x 75mm and 100 x 100mm posts.
They require a sound structural base capable of resisting the leverage applied by the fence.
Do not assume that the following are adequate:
- Loose paving slabs
- Thin patio flags
- Cracked concrete
- Weak screed
- Decorative walls
The post socket, anchors and supporting base must function as one system.
How Do You Install A Garden Gate?
A gate places greater load on its hinge post than a fixed fence panel.
Available gate styles include:
- Fully framed feather edge gates
- Round-top picket gates
- Point-top picket gates
- A framed contemporary double slatted gate
Use substantial gate posts rather than assuming ordinary panel posts are sufficient. Dedicated timber gate posts are available in a 3.0m length and 150mm square section.
Step 1: Confirm The Opening Direction
Check paths, slopes, bins, plants and neighbouring property before deciding which way the gate will open.
Step 2: Set The Gate Posts
Install the hinge and closing posts accurately. Allow the foundations to become stable before hanging the gate.
Step 3: Measure The Clear Opening
Measure at the top, middle and bottom.
Step 4: Allow Fitting Clearance
The gate must normally be narrower than the post opening to allow for hinges, latch clearance and timber movement.
Step 5: Support The Gate
Use stable packing blocks to hold the gate at the correct ground clearance.
Step 6: Mark The Hinges
Position the 450mm tee hinges on substantial horizontal framing.
Step 7: Pre-Drill Where Required
Reduce splitting and keep fixings accurately positioned.
Step 8: Hang The Gate
Check that it swings without dropping or striking the ground.
Step 9: Fit The Latch And Bolt
A 150mm ring latch and 150mm pad bolt can provide closure and additional restraint where suitable.
Step 10: Fit A Gate Stop
Prevent the gate from swinging beyond its intended position and straining the hinges.
How Do You Install A Gate On Sloping Ground?
A gate opening towards rising ground may strike the surface before opening fully.
Possible solutions include:
- Opening the gate towards the lower side
- Providing additional ground clearance
- Changing the path level
- Choosing another suitable gate height
Do not remove a large diagonal section from a framed gate without rebuilding its structure.
How Do You Add Trellis?
Trellis can be installed as a standalone screen or as a topper where the posts and total height allow it.
The available range includes:
- Traditional square trellis
- Privacy square trellis
- Horizontal slatted trellis
- Fan trellis
- Decorative diamond lattice
- Matching trellis battens
For an independent screen:
- Set suitable timber posts.
- Mark the trellis height.
- Use battens where spacing from a wall or post is required.
- Clamp the trellis by its outer frame.
- Check it is level.
- Fix into substantial framing.
For topper trellis:
- Check the existing posts are sound
- Confirm enough post height remains
- Include the trellis in the total boundary height
- Consider the weight of mature plants
- Consider the additional wind load
Do not attach trellis to a neighbour's fence without permission.
How Do You Install Fencing Near Raised Ground?
Ordinary fence panels and gravel boards should not retain a significant depth of soil.
Wet soil creates:
- Sideways pressure
- Constant moisture exposure
- Drainage problems
- Difficulty replacing panels
Construct an independent retaining feature where levels need support.
Pressure-treated landscaping sleepers may be used for suitable raised beds and low landscaping structures when properly supported, fixed and drained. The retaining structure should remain independent from the fence.
What Should You Do In Difficult Ground?
Heavy Clay
Clay can be difficult to excavate when dry and unstable when saturated. Avoid leaving open holes where rain can soften the sides.
Loose Sandy Soil
Loose soil may collapse into the excavation and provide limited lateral support. A more substantial foundation design may be required.
Rubble And Old Foundations
Do not move the post line casually without considering the boundary. Break out enough material to create an appropriate new foundation.
Tree Roots
Adjust the bay layout where possible rather than removing significant roots.
Water-Filled Holes
Investigate the cause before setting posts. Persistent water may indicate drainage problems, a high water table or a damaged service.
How Do You Check The Fence Before Finishing?
Inspect the installation before removing braces and clearing the site.
Check:
- The complete run is straight
- Every post is upright
- Panel tops follow the intended line
- Gravel boards are supported
- Panels are not forced or distorted
- Clips and screws are secure
- Concrete panels are fully seated
- Cut ends have been protected
- The gate swings freely
- The latch and bolt align
- There are no dangerous gaps for pets
- Soil is not piled against timber
- Waste and sharp fixings have been removed
How Should You Maintain The Finished Fence?
Inspect the fence several times each year and after severe weather.
Look for:
- Post movement
- Rot around timber posts
- Loose panel clips
- Broken boards or slats
- Cracked concrete products
- Gate sag
- Loose hinges and latches
- Heavy climbing plants
- Leaves and soil against the fence base
- Algae in damp shaded areas
Pressure-treated timber does not normally need an immediate decorative coating solely because it is treated. It can be painted or stained when sufficiently dry using a compatible exterior product.
Maintain any coating according to its instructions and protect fresh cuts made during later repairs.
Common Fence Installation Mistakes
- Starting before the boundary is agreed
- Ignoring planning or estate restrictions
- Digging without considering buried services
- Choosing panels without selecting compatible posts
- Calculating the layout without including post widths
- Using nominal dimensions without measuring the products
- Installing posts that are too short or too light
- Excavating inadequate foundations
- Checking posts in only one direction
- Allowing posts to push the string line
- Setting the wrong concrete-post configuration
- Loading posts before foundations are stable
- Forcing panels into narrow bays
- Using too few panel fixings
- Fixing through thin boards instead of the frame
- Failing to protect fresh timber cuts
- Forgetting that gravel boards increase fence height
- Hanging a heavy gate from an ordinary weak post
- Adding trellis without checking the posts
- Using gravel boards as retaining walls
- Lifting concrete products without enough help
- Installing broad panels in strong wind
Garden Fence Installation Checklist
Before ordering:
- Confirm the boundary line
- Check the permitted finished height
- Choose the panel style
- Choose timber or concrete posts
- Select wooden or concrete gravel boards
- Calculate the complete finished height
- Measure the actual panel width
- Count intermediate, end and corner posts
- Plan gates and gate posts
- Calculate post mix and fixings
- Plan slopes and shortened bays
- Check delivery and storage access
Before digging:
- Mark the line with string and pegs
- Confirm every post position
- Check for buried services
- Clear plants and obstacles
- Prepare tools and braces
- Arrange enough lifting help
During installation:
- Check each post in two directions
- Recheck every bay measurement
- Keep the string line undisturbed
- Follow the post-mix instructions
- Allow foundations to stabilise
- Keep panels and boards supported
- Use exterior fixings
- Protect cut timber
After installation:
- Check the complete alignment
- Test the gate
- Remove sharp waste
- Clear soil from timber
- Record the completed fence with photographs
- Plan routine inspections
FAQs
Can I Install A Garden Fence Myself?
Yes. A short framed-panel fence on manageable ground can be suitable for an experienced DIYer. Concrete products, difficult ground, steep slopes and heavy gates increase the difficulty.
What Is The Easiest Fence To Install?
Replacing a compatible panel between sound existing posts is normally the easiest job. Low picket fencing with timber posts can also be relatively manageable.
Which Fence Is Hardest To Install?
A tall concrete-post system, traditional closeboard fencing on a steep slope and a fence containing heavy gates are among the more demanding domestic installations.
How Deep Should Fence Posts Be?
There is no universal depth suitable for every fence. The required support depends on height, post type, panel solidity, ground, wind exposure and foundation width.
Can I Use One Third Of The Post Below Ground?
It is sometimes used as a rough starting estimate, but it is not a specification for every site. The complete post, panel, ground and exposure must be assessed.
Do Fence Posts Need Post Mix?
Permanent posts normally need an appropriate foundation. Rapid-set post mix is commonly used for suitable domestic timber and concrete post installations.
Can I Install Panels Immediately After Setting Posts?
Follow the foundation-product instructions. Avoid loading posts until they are sufficiently stable.
Should I Set All Posts Before Installing Panels?
You can set several accurately measured posts first or work one bay at a time. Both methods require careful spacing and stable foundations.
How Do I Keep The Fence Straight?
Use a taut string line, secure setting-out points and repeated measurements. Check the complete run regularly from a distance.
How Wide Are Standard Fence Panels?
Many framed panels are nominally 6ft or approximately 1.83m wide. Confirm the actual product dimensions before setting posts.
How Many Posts Do I Need For Six Panels?
A straight run of six panels normally needs seven posts. Corners, gates and junctions alter the quantity and post types.
Do I Need Gravel Boards?
They are strongly recommended where timber panels would otherwise sit near soil, grass or wet garden debris.
Can Fence Panels Sit Directly On Soil?
Timber panels should normally be held above damp ground using a suitable gravel board.
Should I Use Wooden Or Concrete Gravel Boards?
Wooden boards are lighter and easier to cut. Concrete boards do not rot but require more careful handling.
Should I Use Wooden Or Concrete Posts?
Wooden posts offer natural appearance and easier fixing. Concrete posts resist rot and simplify replacement of compatible panels.
Can Concrete Posts Be Cut?
They should not normally be cut. They may contain reinforcement and can be weakened or damaged.
Can Wooden Posts Be Cut?
Yes, where adjustment is appropriate. Protect exposed timber with a suitable cut-end treatment.
Can Existing Posts Be Reused?
Yes, if they are upright, secure, correctly spaced and strong enough for the new fence.
Can A Rotten Wooden Post Be Repaired?
Some ground-level failures can be reinforced using a suitable concrete repair spur where the upper post remains sound.
Can I Fit Wooden Panels Into Concrete Posts?
Yes, where the panel width and frame thickness suit the post slots.
Can I Use Concrete Gravel Boards With Timber Posts?
Yes, using suitable supports designed to carry their weight.
Can I Cut A Fence Panel To Width?
Many timber panels can be shortened if a new side frame is installed and every cut board or slat remains supported.
Can I Cut A Panel To Height?
It is usually more difficult because the top and bottom frames provide structural support. Choose the correct available height where possible.
Can I Install Fencing On A Slope?
Yes. Rigid panels are normally stepped. Traditional feather edge fencing can follow the slope more closely.
Can I Use Fence Panels To Retain Soil?
No. Construct a separate supported and drained retaining feature.
Can Drive-In Spikes Support A 6ft Fence?
Do not assume they are suitable for tall solid panels. Ground conditions, exposure, panel type and post size must all be assessed.
Can Bolt-Down Supports Be Fixed To Patio Slabs?
Ordinary paving slabs may not provide enough structural resistance. Bolt-down supports need a suitable load-bearing base.
Do I Need Special Gate Posts?
Substantial dedicated gate posts are generally appropriate for tall or heavy garden gates because the hinge post carries repeated moving load.
How Much Clearance Does A Gate Need?
The gate normally needs clearance for hinges, the latch, timber movement and the ground beneath its swing. Measure the actual gate before setting both posts.
Can I Add Trellis To The Fence?
Yes, where the posts and foundations can support the added height, wind resistance and future plant weight.
Does Trellis Count Towards Fence Height?
Yes. Include the gravel board, panel and trellis when assessing the finished boundary height.
Do I Need Planning Permission?
Many domestic fences in England fall within permitted development when they remain within the relevant height limits and no exception applies. Check the requirements for the property and location.
Can I Dig Without Checking For Services?
No. Gardens can contain cables, pipes and drainage routes that are not visible from the surface.
Can One Person Install Concrete Posts?
Concrete posts are heavy and awkward. Use enough people or appropriate handling equipment to keep the lift controlled.
Can Fence Panels Be Installed In Wind?
Avoid handling broad panels in strong wind. They can act like sails and cause falls, impacts or damage.
Should Pressure-Treated Fencing Be Painted?
It does not normally need an immediate decorative coating solely because it is pressure treated. It can be coated once sufficiently dry using a compatible exterior product.
How Do I Stop The Bottom Of Panels Rotting?
Use gravel boards, keep soil and debris away, maintain drainage and repair damaged coatings or boards promptly.
When Should I Use A Professional Installer?
Professional help is sensible for disputed boundaries, difficult ground, steep slopes, heavy concrete systems, major gates, suspected services or tall exposed fencing.
Build The Fence As A Complete System
A reliable garden fence begins with accurate planning rather than the first post hole. Confirm the boundary, calculate the complete height and choose compatible panels, posts, gravel boards and fixings before work starts.
Timber-post systems provide flexible fixing and manageable handling. Slotted concrete systems provide rot-resistant supports and straightforward future panel replacement. Traditional feather edge fencing provides additional flexibility for slopes and unusual bay widths.
Set the first post accurately and treat every following bay as a measured structural section. Keep posts upright in both directions, protect timber from wet ground and do not load foundations before they are stable.
Plan gates, corners, trellis, shortened panels and changes in level from the beginning. These details determine whether the completed fence looks deliberate and remains serviceable.
The panels provide privacy and appearance, but the posts, foundations and fixings keep the fence standing. Choose and install them with the same care as the visible parts of the boundary.