Your Cart
x
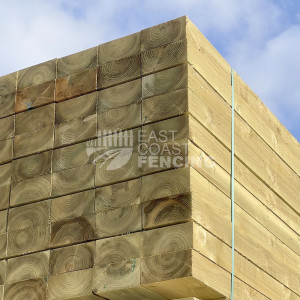
Railway Sleepers
Discover our premium range of railway sleepers, the perfect choice for landscaping, gardening, and DIY construction projects. Our selection offers new pressure treated garden sleepers, suitable for creating stunning raised beds, retaining walls, steps, and outdoor furniture that truly stands out.
Each sleeper is chosen for its durability, quality, and aesthetic appeal, providing a natural, rugged charm to any outdoor space. Whether you're a seasoned landscaper or a home gardening enthusiast, our railway sleepers offer the versatility and strength you need to bring your project to life. Explore the possibilities and transform your outdoor area into a beautiful, functional space with our top-grade railway sleepers.
Subcategories

Our 100x200mm x 2.4m brown railway sleepers are perfect for garden projects. Pressure treated from Irish sawmills, this railway sleeper is well suited for projects such as raised bed kits. Gardening landscaping sleepers offer a contrast against brick or stone.Many online railway sleeper suppliers st..
£34.95
Ex Tax:£29.13
Our 100x200mm x 2.4m green railway sleepers are perfect for garden projects. New, fresh cut & pressure treated from Irish sawmills, this railway sleeper is well suited for DIY projects in the garden.
Many online railway sleeper suppliers state 100x200mm but often supply an undersized prod..
£34.95
Ex Tax:£29.13
Our pack of twenty 100x200mm x 2.4m brown railway sleepers are perfect for garden projects. New, fresh cut & pressure treated from Irish sawmills, this railway sleeper pack is well suited for DIY projects in the garden.
Many online railway sleeper suppliers state 100x200mm but often suppl..
£684.95
Ex Tax:£570.79
Our pack of forty 100x200mm x 2.4m green railway sleepers are perfect for garden projects. New, fresh cut & pressure treated from Irish sawmills, this railway sleeper pack is well suited for DIY projects in the garden.
Many online railway sleeper suppliers state 100x200mm but often supply..
£1,369.95
Ex Tax:£1,141.63Our pack of twenty 100x200mm x 2.4m green railway sleepers are perfect for garden projects. New, fresh cut & pressure treated from Irish sawmills, this railway sleeper pack is well suited for DIY projects in the garden.
Many online railway sleeper suppliers state 100x200mm but often suppl..
£684.95
Ex Tax:£570.79Our pack of forty 100x200mm x 2.4m brown railway sleepers are perfect for garden projects. New, fresh cut & pressure treated from Irish sawmills, this railway sleeper pack is well suited for DIY projects in the garden.
Many online railway sleeper suppliers state 100x200mm but often supply..
£1,369.95
Ex Tax:£1,141.63Our pack of fifty 100x200mm x 2.4m green railway sleepers are perfect for garden projects. New, fresh cut & pressure treated from Irish sawmills, this railway sleeper pack is well suited for DIY projects in the garden.
Many online railway sleeper suppliers state 100x200mm but often supply..
£1,712.95
Ex Tax:£1,427.46Our pack of fifty 100x200mm x 2.4m brown railway sleepers are perfect for garden projects. New, fresh cut & pressure treated from Irish sawmills, this railway sleeper pack is well suited for DIY projects in the garden.
Many online railway sleeper suppliers state 100x200mm but often supply..
£1,712.95
Ex Tax:£1,427.46")
Tube of 10 flush head timber screws ideal for use with our garden sleepers, decking or other timber structuresHardened flush head structural screwsSelf drilling point minimises the need for pilot holesGreen organic coated for 1000hrs salt spray corrosion resistanceMilling shank to help clear hole in..
£12.95
Ex Tax:£10.79")
Box of 50 flush head timber screws ideal for use with our garden sleepers, decking or other timber structuresHardened flush head structural screwsSelf drilling point minimises the need for pilot holesGreen organic coated for 1000hrs salt spray corrosion resistanceMilling shank to help clear hole in ..
£45.95
Ex Tax:£38.29Showing 1 to 10 of 10 (1 Pages)